Sections of the site
Editor's Choice:
- IFRS: how to calculate earnings per share How to calculate earnings per share formula
- Law on microfinance activities and microfinance organizations
- Receiving an extract from the BTI technical plan Fill out form OS 1b
- How to fill out a notification about taxable objects for property tax Notification about selected taxable objects
- Salads with red beets
- How to prepare raspberries for the winter: we share the best recipes for jams, compotes and freezing
- Russian breakfast: millet porridge with milk and pumpkin
- A simple recipe for shanezhki with step-by-step photos How to bake homemade shanezhki from cottage cheese
- Beet salads: delicious recipes with photos
- How to cook cutlets with eggs inside
Advertising
| Is it difficult to make soap at home? How to make soap at home with your own hands. Cooking recipes step by step with photos. How to make handmade soap at home |
|
This type of handicraft, such as making soap at home, is now gaining increasing popularity. Homemade soap is natural, it contains only those substances that will be beneficial to your skin in combination with the scents that you like. Soap making for beginners is a simple process. The main thing is to understand the ingredients and the rules for their arrangement. This is what we will do in this article. Let's try to figure out what it is - homemade soap making. Recipes for beginners will also be presented below. Of course, not all, but some of the existing options. What is used to make soap?Homemade soap making for beginners involves having the ingredients to create a particular soap. So, let's look at what substances someone who decides to brew a natural detergent at home will need. First of all, no soap can do without fats. They are the main component. Soap making at home for beginners, as well as for experienced craftsmen, involves the use of fats of both animal and vegetable origin. Rendered pork fat is often used as a base. This is the most economical option, but the final product will smell like laundry soap. If you use vegetable oils, the aroma will be much more pleasant. The next important component is alkali. It is this that ensures the saponification of fats. This could be, for example, caustic soda or sodium hydroxide. You will also need stearic acid. It is what is most often found in fats and oils. It is added to give the soap hardness.
Another component is salt. It is best if the salt is sea salt. After all, it is very rich in substances that have a tonic and strengthening effect on the skin. Beeswax is used not only to impart hardness. It adds shine and aroma to your soap. You can even decorate the finished block by gluing natural honeycomb to it. If you want the resulting soap to have a scrub function, add ground nuts, seeds (just a little) or oatmeal to it. Creating colorClay, mustard powder, paprika, cocoa, ground coffee, vegetable juices and herbal decoctions, honey, beer, milk, etc. are used as natural dyes.
Of course, chemical dyes (food dyes) give a more saturated color, but natural ones are still more acceptable. Creating a scentVarious substances are used to impart aroma to soap. You choose whether they are natural or synthetic. Soap making for beginners (recipes will be given below) allows you to use natural essential oils, as well as artificial flavors. These can be special fragrances, food flavors, perfumes or aromatic oils. Those that are created artificially can cause allergies. Therefore, it is preferable to use natural ingredients. Security measuresSoap making for beginners and for experienced ones, however, also requires compliance with certain safety rules. Carry out all work with gloves to avoid skin burns. It would be nice to wear an unnecessary robe. Cover the table on which you will work with newspapers or some unnecessary tablecloth. The entire process should be carried out away from children and pets. Cleaning after finishing work should also be done with gloves. All utensils that you use for making soap should never be used for cooking. It should be kept separate from all other utensils. Soap making for beginners based on baby soapBaby soap is just what you need in this case. It will allow beginners to quickly master soap making. You can see a photo of the final product made in this way in this section.
Choose the simplest baby soap without additives or fragrances. The product you choose should be melted in a water bath with the addition of a small amount of water. Afterwards, you need to enrich it with oils and add fragrance, as well as all those components that you would like. The advantage of this method of creating soap is the availability of materials. But it was not without its drawbacks either. First, scented soap creates problems. And secondly, the duration of melting of the product is quite long. Plus, you won't be able to create clear soap. Using a special baseThe basis for creating soap is a kind of semi-finished product. This is almost finished soap. It just has no color or smell.
It is much easier to work with than baby soap. It melts very easily and there is no need to add water. It also hardens quite quickly and easily takes any shape. Making soap without baseThe third method of making soap at home is the most difficult. But only in this case can you independently select and control absolutely all the ingredients.
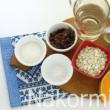
When preparing soap in this way, you cannot do without a respirator and glasses, since the work uses alkali. In addition, you will need scales and a device to measure the acidity of the medium, or at least indicator strips. This method can be cold or hot. Soap made using the first method cannot be used immediately. It must sit for about six weeks for the alkali to be completely neutralized. Soap making at home for beginners: recipesHaving mastered simple ways When making soap, you can safely start experimenting and come up with your own special options. Using all kinds of herbs and spices, you can create truly healthy products. We figured out how to organize soap making at home for beginners. The recipes that will be discussed below are just a small part of the huge number of possible options. Milk soap with honey. To create it, you will need a piece of baby soap weighing one hundred grams, milk (two-thirds of a glass), ten grams of honey, one teaspoon of glycerin, one tablespoon of sea buckthorn oil. For scent, use citrus essential oil (fifteen drops). You can decorate the finished block with chamomile flowers. Scrub soap with coffee or oatmeal. For one hundred grams of baby soap you need to take one hundred grams of milk, a teaspoon of freshly ground coffee or oatmeal, two teaspoons of cocoa butter and chocolate or vanilla flavoring. To make it look more impressive, use brown dye.
Two-layer soap with dry lavender flowers. It will be very beautiful. It will require two basics - white and colorless. You will need to add dried lavender flowers to the colorless layer, about five grams of which you need to take. In addition, for 60 grams of each foundation you will need 3 drops of jojoba oil and lavender essential oil, as well as one drop of patchouli essential oil. For color, take a couple drops of blue dye. Honey soap with wax. For one hundred grams of colorless soap base, take half a teaspoon of honey, a third of a teaspoon of olive oil, geranium essential oil (five drops) and three drops of dye yellow color. And of course, a piece of wax. To ensure that the foundation sticks to the soap neatly and does not melt, place it on the bottom of the mold, press it and fill it with a small amount of molten base (no more than two millimeters thick). Once it has set, spray the base with alcohol and fill the mold to the top. Or vice versa, first fill the entire mold, wait for a crust to form and add a little more. Before the last portion has hardened, glue a piece of foundation and press down well. This also works out very well. So, we found out what soap making is for beginners, what you will need for this, and also got acquainted with the most commonly used additives. Soap making is a huge field for experimentation. Today it is not at all difficult to get necessary materials. Everything you need can be purchased at craft stores. And the process of creating soap is so exciting that it will surely give you a lot of pleasure. The secret to making soap self made, is not known to everyone. Otherwise, the business of selling natural soap would not bring such profit and people would not bring a new fragrant bar of magical action from every business trip.    The advantages of handmade soap include not only the purity of the product, but also uniqueness and individuality. You can independently select and add to the bar those nutritional components that your specific skin type needs. If you give a gift to a teenager, you need to take into account the increased likelihood of acne. Men need to soothe their skin after shaving. And confident women should be given skin care, youth and freshness along with soap. Ingredients requiredTo make your own soap, you need to purchase the necessary components:
  
After preparing all the components, you need to start making soap.    Let's start doing magicAt first soap base grate it so that it melts faster in a microwave oven or in a water bath. Base oil is added at the rate of 3 teaspoons per 100 grams of base. Milk, cream or water is added while the base melts to obtain a creamy mass. Excess water causes the soap to separate, so it is best to add sugar to help the base melt faster.    The soap is poured into a mold and sprinkled with alcohol so that there are no air bubbles on the surface. Leave in the refrigerator or other cool place for 2-3 days until completely dry. All that remains is to remove it from the mold and give it to your loved one. Anyone can make this soap themselves at home.   
Master class with step-by-step photos on making handmade soap     The only thing better than flowers is a bouquet of handmade soapIf you don’t know what original gift to give to a friend, mother, mother-in-law, or lover, always remember that a gift made with your own hands is most valued. Considering women’s love for flowers, these two points can easily be combined and get the perfect bouquet - made from handmade soap.   If desired, you can make a bouquet of any number of flowers. Considering that roses are considered universal, you need to learn how to make them first. Knowing the basics, you can easily make any other flower. To make soap roses you will need:
Gelatin is poured cold water and leave to swell for half an hour - 50 minutes. At this time, the baby soap is grated and, stirring constantly, melted in a microwave oven or in a water bath until smooth. At this stage, flavors and cosmetic oils are added.    Add already swollen gelatin to the mixture and pour the soap into various forms (hair spray caps, baking dishes, empty cases for watercolors or cosmetics are suitable). It is better if the containers are silicone, since it is impossible to get soap in its original form from glass or metal. Place the resulting masses in the refrigerator for 10-15 minutes until hardened. The soap cylinders will be slightly damp and still warm. Use a paring knife to remove thin round layers of soap. These are already petals for the future rose. They can be different shapes and size. That's the beauty of it. To create the core, you need to twist one soap petal slightly diagonally. The next few petals need to be wrapped around the core.     To make the rose look like it has blossomed, you need to turn the edges of the next petals slightly outward. Continue until you get a flower of the required size. If the cone turns out to be too long, you can cut it off with a knife. The leaves for the bouquet are made from soap in the same way as flowers, but in a different color. The veins are drawn with a toothpick or needle. A rose with a leaf can be made into a separate flower to make a bouquet. Or you can use it to decorate a bar of soap. It all depends on the desire of the master.
How to make a drawing on soapHandmade soap with a pattern is one of the most original gifts, which seems very difficult to make at home. If you choose a drawing that is close in spirit to the person to whom the product will be given, or even his photo, you will give not just hand-made soap, but a work of art in which your soul has been invested.    First of all, you need to select a thematic picture and print it on special water-soluble paper. It will be better if you use a color laser printer, since it accurately conveys all the colors that are not distorted during further manipulations. Before starting work, the drawing must be thoroughly dried and sprayed with hairspray. Soap base or baby soap must be melted in a microwave oven or in a water bath so that there are no air bubbles. Dyes and flavors are not added to this layer, as they reduce transparency, which is necessary for image clarity. The resulting melted soap is poured into a pre-selected mold in a layer 2 mm thick and a picture is placed on top, pattern down. To avoid air cavities, you need to immediately decide on the location of the printout. Sprinkle it evenly with alcohol on top and pour a 1.5 mm layer of soap on top. This is done so that the white layer does not spoil the picture if it leaks under it. Alcohol treatment is necessary to eliminate bubbles on the surface.     The next layer is white. It shows the best picture. Therefore, a little soap according to the mold is melted so that there is enough and poured on top of the already solidified transparent layer treated with alcohol. After complete hardening, the next thick layer can be decorated in an original way using soap shavings, glitter, coffee beans, dried flowers or other decorative elements. If shavings are selected, they must first be frozen so that they do not melt when they are poured into the next hot layer.
Step-by-step master class on making multi-colored soap         How to make handmade soap with inscriptions: cute, fast, cheapTo reach the heart of a loved one or simply cheer up a friend, you can give an original handmade soap with an inscription that is relevant and meaningful to you or the person. Experts identify two main ways to decorate a product. To implement the first method, you need to pour not a large number of melted baby soap in advance onto cling film and let it harden a little. On this basis, cut out the letters needed for the phrase with a sharp object, preferably a needle or toothpick. After complete hardening, the base easily comes off the film. The main thing to remember is that you need to write the letters in a mirror image, since the front of the soap will be at the bottom of the mold.  Attach the stencil to the finished bar of soap, take a sharp object, such as a wooden skewer, and trace the letters Attach the stencil to the finished bar of soap, take a sharp object, such as a wooden skewer, and trace the letters The second method involves having a ballpoint pen and plain paper. It looks a little cheap if you don't write it carefully. You need to write the phrase in bold and fill it with a thin layer of soap base. After hardening, the inscription easily remains on the soap, and the paper is torn off with a sharp movement. After the manipulations have been carried out, the printed phrase is placed in a soap mold and poured a second time with the melted base. To ensure that the layers stick together, do not forget about treating with alcohol.
Useful properties of laundry soap in handmade soapLaundry soap has lost its popularity in the 21st century due to its unattractive appearance, smell, and shape. However, everyone over 30 knows about beneficial properties brown substance:
There are three known methods of soap making based on laundry soap. 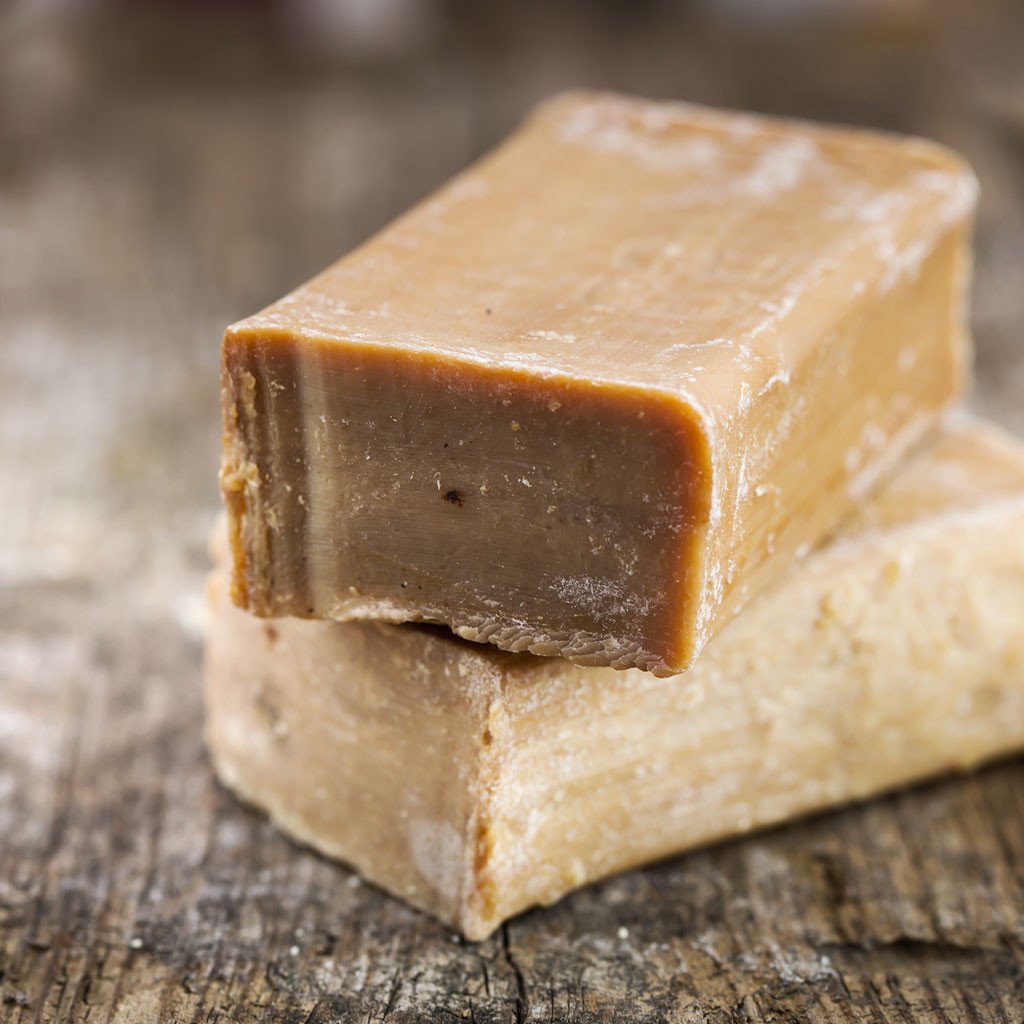 One of them is a three-layer kitchen one - it eliminates any contamination, including greasy stains and food residues on the plate. The basic rule of use is to wear gloves, as the product dries out the skin. To prepare kitchen soap, you need to take 100 grams of laundry soap, grate it, add 180–200 ml of water and melt it in a microwave oven or in a water bath. When the resulting liquid resembles honey, beat it with a mixer at low speed. Collect the foam in a separate container. The mass, which has already been melted, is divided into three parts. To the first add a tablespoon of mustard powder, to the second - 2 tablespoons of coffee grounds, which will get rid of the unpleasant odor, and a spoon of castor oil. To glue two pieces of soap, you need to sprinkle the first layer with alcohol and pour the second one on top of it. Alcohol also removes air bubbles. The third layer with soda to enhance the cleansing effect. It is mixed with the foam that remains after the first whipping of laundry soap, and a tablespoon of soda. When laying this layer on top of the previous one, do not forget to moisten it with alcohol. Soap in the shape of hearts - a cute gift for loved ones Handmade soap should be left to dry for at least a week. There will be no characteristic odor, the cleansing properties will increase several times. The second method of making handmade soap will appeal to girls who take care of their skin condition, as this product nourishes and moisturizes it. You need to dissolve 150–200 grams of laundry soap and thoroughly mix with the ingredients one tablespoon each of honey, sunflower, sea buckthorn and castor oil, 100 ml of boiling water and one dessert spoon of apple cider vinegar. After obtaining a homogeneous mass, add 1 teaspoon of anti-cellulite oil, chlorophyllipt, vitamin E and 0.5 teaspoon of glycerin or baby cream. For a pleasant smell, add 10 drops of lavender essential oil or men's eau de toilette to the soap. Once cooled, simply place in the freezer for just one hour. Then you can use it. The third recipe contains milk, so the soap is excellent for delicate and sensitive skin. 80 ml of milk is mixed with 100 grams of laundry soap, previously grated, and the mixture is melted in a microwave oven or in a water bath, stirring occasionally. To speed up the process, add 1 tablespoon of honey. When the soap dissolves, beat it with a mixer until light and cool. To the mass, which has already cooled, you need to add a tablespoon of apple cider vinegar, olive oil, castor oil and vodka. Almond essential oil helps to completely remove the aroma of laundry soap, but it is contraindicated for pregnant women and children under 6 years old, so it is better to use chocolate, cocoa, ginger, cinnamon and other aromatic additives.
Homemade Soap from Scratch is Fascinating creative process on creating soap masterpieces with your own hands. Soap makers who have long been familiar with this method note a lot of positive properties and advantages of such soap. After all, only well-known, completely natural ingredients are used for its production, which have such a beneficial effect on the skin of the face, hands, body, hair and scalp. How to make soap from scratchMaking soap at home from scratch can seem like a super difficult process for beginners. However, there is nothing complicated about it. On the pages of our website we try to post exact soap recipes from scratch, with step by step instructions and mandatory security measures. In order to figure out how to make soap with your own hands from scratch, just carefully read several recipes. The main components for such soap are lye, water and base oil, such as olive. From the three listed ingredients you can already make soap with your own hands. This is perhaps the simplest recipe for beginners, which is also presented on our website. Having dealt with the nuances, you can proceed to other, no less interesting recipes. Homemade soap from scratchAdded to soap different types oils, scrubbing organic particles, herbal decoctions instead of water, etc. As a result, soap making will turn for you from an unknown form of creativity into an attractive world of soap making, constantly attracting with new recipes. Soap recipes from scratchThe Do-It-Yourself website already has a number of attractive instructions for making soap from scratch, and we don’t stop there. In the future we plan to look into other recipes, and we will definitely post the most interesting of them on the website.
Firstly, this is a kind of exclusive, handmade, and simply beautiful, fragrant product that can be used both for its intended purpose for hygienic purposes and as a gift. Secondly, unlike store-bought, it is a natural product and therefore safe for. Looking at the label of a hygiene product, it is not difficult to understand what the manufacturer used in its production chemical substances and various additives that sometimes have Negative consequences to your health. As a result of using such a product, unpleasant sensations on the skin may occur: itching, peeling,... When making soap with your own hands, natural ingredients are selected, so this cosmetic product is safe for health and can be used even for sensitive skin and allergies. Handmade soap (see photo below) looks very beautiful and, in addition, has a pleasant, incomparable aroma:
“How to make soap with your own hands” is one of the most frequently asked questions regarding the production of natural cosmetics at home. On the one hand, you can buy this product, but it is quite expensive. In addition, in the process of making soap with your own hands, you can make it the way you want by choosing the shape and aroma.
Currently, many people are engaged in the art of soap making, for whom this work has become not only good source income, but also This process is very exciting, since those who make natural soap with their own hands are given an excellent opportunity to independently select the components and show creativity and imagination.
Another advantage of this type of hobby is that now the person doing it will always have an original and necessary gift in stock for any occasion. Moreover, such a gift will undoubtedly appeal to both men and the fair sex. How to make soap at home with your own hands: making kitWell, now, let's move on to the main question of how to make soap at home with your own hands. For traditional home soap making you will definitely need the following components:
The soap base can be different, depending on who you like. For example, the use of a base taken from ordinary industrially produced cosmetic soap is not prohibited. It is worth mentioning right away that such a base will have a specific, pungent odor that is difficult and sometimes impossible to overcome. When mixing it with other components, there is a risk of getting a bar with an unpleasant odor. Baby soap is also suitable for preparing the base; although it also contains chemicals, it often has a calm, subtle aroma. Perhaps the best option would be to purchase a soap base based on natural oils (coconut, palm, etc.) in the store. When choosing additives, you should be guided not only by your own preferences, but also take into account how they can diversify your assortment homemade soap, as well as what results they will bring. In any case, you will need oils without a strong odor. Olive, peach, almond, avocado, jojoba, coconut and others are suitable. To give a fragrant smell to the future bar, you cannot do without essential oils. Here you are allowed to give free rein to your imagination. Lemon, lavender, ylang-ylang, orange, bergamot and others oils are perfect as a flavoring agent. Also, petals and flowers of various plants will not be superfluous as fillers.
If the task is to prepare scrub soap, then coffee beans will come in handy, sea salt, sugar, crushed oatmeal. These fillers will help remove dead skin cells, cleanse well, soften and smooth the skin, and make it soft. To make soap for oily skin, you will need lemon zest, which has a drying effect. One of the most important components is glycerin, which has... In addition, this substance relieves irritation and dries out oily skin. When preparing a cosmetic bar, you will need milk, cream or water in a small amount to dilute the soap mass. A kit for making soap with your own hands can be very different, you just need to use your imagination. To create an original, beautiful soap you will definitely need special accessories, these are:
How to make beautiful decorative soap with your own hands: making colored soapA colored cosmetic product looks much more attractive than a white or neutral shade, which is why natural dyes are used in its production. So, let's try to figure out how to make colored soap with your own hands. Coloring pigments will help give the bar a tint:
To get the pink color, you should use beetroot juice. To obtain blue – chamomile essential oil. A yellow tint will come from saffron, a green tint from spirulina algae, a brown tint from chocolate, and a black tint from coffee. Along with natural ones, artificial dyes are also widely used, which can be dry or liquid. Pigments and mother of pearls are used to color soap. Dry dyes are more economical because, due to their concentration, it is enough to dissolve a small amount in water and then add a few drops to the soap.
Liquid ones are more convenient to use, since they do not need to be diluted, but can be immediately added to soap at the rate of 5 - 10 drops per 100 g of soap liquid (depending on what shade you want to get as a result: light or saturated). Having bought several colors, you can mix them together, getting various interesting color combinations.
If you are interested in how to make beautiful soap with your own hands, you should also pay attention to insoluble colored powders - pigments that give unusual combinations of shades. For 100 g of soap solution you will need 1/3 teaspoon of pigment. Before the pigment colors the soap mixture, it is dissolved in fatty oil, this allows you to obtain a uniform slurry, which will subsequently color the soap base.
Mother of pearl will be of interest to those who are wondering how to make decorative soap with their own hands, so that it is not just beautiful, but original and refined. This component helps turn an ordinary bar into a real masterpiece, making it elegant and impressive. It is better to use it in combination with dyes. How to make soap with your own hands: a traditional recipeThere are many recipes on how to make soap with your own hands; below is the traditional, most used one.
If you use crushed soap, you must definitely melt it, but in no case on the stove, but in a water bath or in the microwave. The heating should not be excessive, just wait until it melts. It is best to use a thermometer for liquids in this case. The base should heat up to a maximum of 65 °C. When melting in a microwave oven, there is a risk that the base will overheat and boil, so if you choose this method, you need to check its condition every 20 seconds.
Once the base has acquired the required consistency, you can begin mixing it with essences. This could be perfume, essential oils, honey, vanilla, etc. Ready-made essences intended for soap making are also suitable. We must not forget that they have sharp, strong odors, so it is important not to overdo it, adding very little at a time.
Having dealt with flavorings, you can move on to dyes. But they should be added with caution, since it is very easy to overdo it. You need to add the dye gradually; if the color turns out to be pale, add a little more until the desired color appears.
When you need to make soap with moisturizing properties, you cannot do without natural vegetable oils: jojoba, coconut, almond, sea buckthorn, argan, peach. Wheat germ, mango, and grape seed oil also have an excellent moisturizing effect. Do not neglect liquid vitamins A and E. How to make your own moisturizing soap and scrub
How to make scrub soap with your own hands - very actual question for those who decided to create a rich assortment of cosmetic bars for various purposes.
Scrubs have an exfoliating and cleansing effect, ridding the skin of “unnecessary debris.”
To make them you will need salt (sea or fine table salt), or ground coffee, sugar, semolina or corn grits, chopped nuts, ground oatmeal.
When preparing moisturizing soap, you should remember that by overusing vegetable oils, you can get a bar that is too soft and will not harden.
The finished soap mixture is poured into molds. To make the finished soap easier and faster to remove at the end of work, the molds should be lightly greased with any vegetable oil or Vaseline. How to make a stamp for original soap with your own handsNow the store sells molds with different reliefs, which will be useful for those who are going to make unusual soap with a convex pattern. To give a special flavor and uniqueness to the bar, it is recommended to use special stamps.
You can buy them in the store, but it’s better to make them yourself, just to do this you need to learn how to make a stamp for soap with your own hands. For this, a regular flat eraser is suitable, on which, with the help of a small knife and nail scissors, it will be very easy to cut out any intended design. Prepare the original cosmetic product in this way:
It happens that after adding the soap composition to the mold, bubbles appear on the surface. To avoid this, you need to spray the surface with vodka or alcohol using a spray bottle for this purpose.
After this, the soap mass is removed to dry for several days in a cool, dry place. After several days of drying, the soap can be easily removed from the molds and admire the beautiful, fragrant cosmetic product made by yourself.
If the mold has not been pre-lubricated, then it will be difficult to remove the bar. You will need to place the mold in the freezer for 5 minutes, then pour boiling water over it. The soap should immediately separate from the mold.
The solid bar is ready for use, but to prevent it from drying out, it is best to place it in plastic packaging. Then the soap will last for months without losing its original properties. DIY soap recipesAnyone can make soap on their own; all it takes is desire, effort and imagination. But if your imagination fails you, and you have no experience at all in this matter, we offer interesting, proven recipes for making soap with your own hands: Soap "Honey".
The base is made from 100 g of glycerin soap, finely grated. Glycerin in this recipe was not chosen by chance, because it gives the yellow tint inherent in honey.
The crushed particles must be dissolved in warm water, add a couple of tbsp. spoons of honey, 3 tbsp. spoons of olive oil or the same amount of glycerin.
Soap "Marble".
It is worth mentioning that the resulting block will externally resemble a marble stone, which is very beautiful and unusual.
For the soap base you will need 100 g of baby soap, which you need to grate, place in a water bath, add 150 ml of milk and 1 tbsp. a spoonful of honey.
The resulting mass must be stirred constantly to ensure it is uniform.
When the mass becomes liquid, remove it from the heat and divide into two equal parts. Add 1 tbsp to one part. spoon of sea buckthorn oil, 4 drops of orange oil, in another - 1 tbsp. a spoonful of olive oil and 3 - 4 cubes of chocolate, grated.
Cool the resulting mixtures and pour into the mold as follows: 1 layer – orange, 2 – chocolate, 3 – orange, 4 – chocolate. Then mix the mixture and leave to cool. The result will be “marbled” soap. Soap "Chocolate-vanilla".
This soap is attractive appearance and a sweet vanilla aroma.
To prevent the aroma from being interrupted by strong perfume odors, it is recommended to use 100 g of grated baby soap for the base.
Melt the crushed particles in a water bath, adding 4 - 5 drops of vanilla essential oil, 2 tbsp. spoons of almond or olive, 2 drops of ylang-ylang essential oil, 0.5 teaspoon of cocoa powder, 1 teaspoon of ground oatmeal, 0.5 teaspoon of ground coffee, liquid vitamin E (1 capsule), 1 tbsp. spoon of honey. How to make two-color “Emerald” soap with your own handsWhen used, this soap invigorates, lifts your mood and gives the skin a delightful aroma. Soap manufacturers often wonder “how to make two-color soap with your own hands,” because such a cosmetic product is in good demand among customers. In this case, there can be any number of interesting ideas. Below is an original and at the same time simple recipe for making a two-color masterpiece: Soap "Emerald". The soap base is prepared from 100 g of baby soap, grated. Small chips are poured into a pan, filled with hot water (1/3 cup) and melted in a water bath for 20 - 25 minutes. At this time you need to prepare the remaining ingredients:
Pour a small amount of water into a small container, add 0.5 teaspoon of natural green food coloring, add 5 drops of mint essential oil. In another cup, add 8 drops of olive oil and 5 drops of sea buckthorn.
Mixtures of oils should be poured into the finished molten soap base; the result will be a yellowish or creamy tint. Now we have two containers, one of which contains a cream-colored soap base, the second a greenish mixture with a mint aroma. You need to pour the mixture from two containers at the same time into the prepared form. Thus, you will get a block of two parts: yellow and light green.
This product will delight you not only with its attractive appearance, but also with its excellent properties. Peppermint essential oil relieves inflammation, dries out oily skin, and its aroma tones, restores lost energy, and replenishes vitality, fights fatigue. Olive oil has anti-inflammatory and anti-inflammatory properties, while sea buckthorn oil moisturizes well. In other words, “Emerald” soap will be an excellent cosmetic product that cares for the skin. The following video will tell you more about how else you can make soap with your own hands:
How to make liquid soap with your own hands from inexpensive ingredientsLiquid soap is considered more convenient to use than solid soap. In addition, it can be used as a shower gel.
Store shelves are literally full of all sorts of brands of liquid soaps, but none of them can compare with what is prepared at home. Why? Everything is very simple: it is homemade and contains natural ingredients that make it safe and most effective.
To make a soap base, you can take any ordinary hard soap and grate it, but baby soap is best because it is odorless, which means it will not interrupt the aroma of the finished product.
Place the resulting shavings in a small container, pour 1 cup of boiling water, and beat with a blender. Add 1 tbsp to the finished homogeneous mixture. spoon of honey, 1 tbsp. a spoonful of glycerin, 5 - 7 drops of any essential oil, mix thoroughly. Leave the mixture to cool for 15 minutes. After this time, add 1/3 cup of cold water and beat. DIY liquid soap is ready to use. Now you can pour it into the dispenser.
Additional components may vary, but it is always recommended to use baby soap and glycerin as a basis. The benefits of baby soap have already been discussed regarding glycerin - this ingredient is an excellent skin moisturizer. How to make natural shampoo with your own hands
It's no secret that any, even the most expensive shampoo contains a large amount of chemicals, preservatives and dyes. That is why sometimes, as a result of using such shampoo, itching, irritation of the scalp, and other troubles appear. Shampoo made from natural ingredients is much healthier. But where can I get it? It turns out to get We spend a lot of time on bath procedures. Because taking care of personal hygiene is very good and it undoubtedly has a positive effect on your health. When taking a bath or shower, be sure to take your favorite scented soap with you. Many people don’t even think about what it consists of. But everything is simpler than that. Just today I will tell you how to cook this hygiene product at home. Even a child can cope with this simple task. For some, having tried to make it once turns into a hobby, because it is not only pleasant to wash with your own product, but also safe. Because nowadays, due to the huge selection of products on the market, manufacturers are negligent in the manufacture of this product. Thus stuffing it with all sorts of harmful and, God forbid, prohibited chemicals in order to reduce the price of the product. Once you master the soap-making procedure, you will be able to add only those ingredients that you like. You can impart an incomparable aroma. Having beautifully decorated it and made an original shape, it will not be a bad gift for various holidays, be it a birthday or March 8th. By doing this, you will undoubtedly surprise the person, because this gift is primarily made with your own hands. Some people for whom soap making has become a hobby begin to slowly sell it, and therefore increase their budget. First, you need to go to a specialized store and purchase a soap base. You can replace it with baby soap. History of soap makingSo, let's begin our soap story, not just any soap opera, but true story soap It is believed that this hygiene product appeared around three millennia BC. The first time it was written about was 2200 BC. It was then that the Sumerians wrote about it on clay tablets, or rather about its production. Despite the fact that so many millennia have passed and similar manufacturing technology is used today. There is one of the oldest documents, the Ebers papyrus, which says that in Ancient Rome for washing hands they used a substance made from ash and fat. In order to improve the cleaning properties of soap, they began to add soda, or rather mix it with ash. For a long time it was believed that soap came to us from Rome. Because the first soap factory was found precisely on the ruins of Pompeii. Quite a lot of time passed after people discovered the catch. The version they put forward turned out to be wrong. In fact, it was not a soap factory, but a so-called laundry (fullonika).
There is a belief in the world that the word soap originated from Mount Sapo located in Ancient Rome. In fact, this is nothing more than a legend, because such a mountain does not exist. Soap was not always used for its intended purpose. For example, the Arab physician Avicenna prescribed this procedure to his patients when a person developed a rash or various skin diseases. Healthy people He advised using clay to cleanse the body. In fact, what is produced now in factories can hardly be called soap, since synthetic additives are used in its production. And plant ash is almost never used today, because the purity of the product (ash) cannot be guaranteed. Also, the technology that was used before is very complex and takes a lot of time. Therefore, now, instead of ash, alkali is used. Many people, when making soap, begin to abandon animal fats. They use components that have appeared not so long ago: for example CO2, silk, floral waxes and essential oils. Despite this, soap, which has been known to mankind for many thousands of years, remains to perform the same skin cleansing functions as before. Essential Ingredients for Making Soap from ScratchProbably almost every person who is going to learn soap making has thoughts running through their heads that it should not only be fragrant, but also have an original, unique shape. In fact, it is so, because when cooking, you can use various molds in the shape of hearts, favorite flowers or exotic animals. If you have specialized stores, you can even buy multilayer molds there, with which you can combine several colors in one blank.
Many people start using children's sandbox molds at the beginning. If you love baking, you probably have silicone molds; they are perfect for cooking. You will also need two saucepans: a large and a small one to create a water bath. You will pour water into the large one and place it on the stove, and put the soap itself into the small one. By placing one inside the other, you can easily melt the workpiece. In general, you can use various devices for making a water bath. You can also melt the soap base in a regular microwave oven by placing the mixture in a plastic bucket or glass. You will also need several plastic cups, toothpicks, a spoon or wooden stick for stirring, an ordinary grater, a spray bottle of alcohol, and any paper towels or napkins. We're done with the inventory, let's move on to the ingredients.1.Essential oil. If you want to give your soap a fragrant aroma and soften your skin, you cannot do without it. There are various scents on the shelves, it’s up to you to choose. 2. Dyes.
To dye your soap your favorite color, you need special dyes. They can also be replaced with natural ones, using vegetable or fruit juices. Personally, I used grapes, or rather their juice, but it’s up to you to choose. 3.Additives. In addition to your favorite scent and color, you can include so-called additives in your soap. For example, to make a scrub, you can use crushed oatmeal, coffee beans or shells walnut. One of the popular additives is coconut flakes. You can also use honey, lemon or cream. Various healthy herbs or berries dried from summer. In general, it all depends on your imagination. 4.Loofah (optional) Using this ingredient you can make soap with a washcloth, so let's say 2 in 1. I think we’ve sorted out the inventory, now let’s move on directly to the process itself. How to make soap from soap remnantsMaking soap from debris is very easy. It will take you very little time to make it. Today we will look at two product options - liquid and regular toilet. For normal, you will need
Preparation1.Take the soap shards and collect them in a separate bowl.
3.The third step is to pour some water into the pan and put it on the fire. You will need to take one part water to one part soap.
4.After heating the water, pour our ingredient into the pan. 5. Stirring constantly, cook until it is completely dissolved in water. 6. Take vegetable oil out of the refrigerator and grease the molds with it.
7.Remove the pan from the heat and add a little essential oil to it for scent. Then we immediately pour it into molds.
8. Let the soap cool slightly and place it in the refrigerator until it hardens completely.
Your handmade scented personal care product is ready. You can watch the video in more detail:
Good luck in your endeavors! Liquid soap made from soapA lot of soap remnants that have probably accumulated in your kitchen can be successfully turned into liquid soap. A small handful is enough to get about 1 liter of product. Can you imagine how much savings this is? So start immediately.
Ingredients
Preparation1. First of all, put the water on the stove, it will boil and here we will arrange a water bath to melt the soap.
2. While the water is boiling, grate the soap. We need 50 grams per liter portion.
3.Add 1 liter of water to them and place in a water bath. You need to be prepared that the soap will not dissolve completely. There's nothing wrong with that.
4.When the main ingredients have dissolved, remove from the water bath. 5.The next step is to add calendula tincture, two tablespoons. If there is none, anything that contains alcohol will do, because that is what we need.
7.To make the color of the soap uniform and beautiful, add a little food coloring. A couple of drops will be enough. 8.Now pour in 4 tablespoons of glycerin. Its role is to increase viscosity and maintain the necessary moisture content of the soap. Our soaps are different in composition, but thanks to glycerin everything will mix. 9. Mix the resulting mass thoroughly. After the reaction has occurred, it is necessary to strain everything, because there is big pieces, which did not dissolve. For this we use a sieve.
10.Pour the finished raw material into a bottle. It must be allowed to cool before use.
After the soap has cooled, a natural pearl will appear, it will be no worse than store-bought soap. More than that is even better. This detergent can be used to wash not only your hands, but also dishes. And your mother and grandmother will be grateful to this. A liter of liquid soap is ready, which we made from practically nothing.
Enjoy it for your health. How to make soap from soap baseAbove we have covered more simple options preparations. If you want to do this on a professional level, turn it into a hobby, or surprise your friends and acquaintances, then this article is just for you. Today I'll show you how I pour small pieces of soap base into molds. This applies to plastic forms that have convex elements. They can be decorated with different colors.
Everyone does it differently, so my method is not the only correct one. I will pour soap with a snowflake. You will need
Let's move on to cooking1. Melt the soap base in a water bath or in the microwave. Be sure to make sure the base doesn't boil. 2.After the base has become liquid, it can be painted with white dye. Make sure that it is not very hot, because many molds cannot withstand temperatures above 70 degrees. 3.You can use a food container to ensure that the mold stands up straight. Place a mold on top of it. 4.In order for the base to flow into small elements, the mold must be sprinkled with alcohol. After this, carefully pour the base so that it fills the snowflake. The excess can be removed with a toothpick after hardening, this will happen within 10 minutes.
5.Prepare a soap base for the main layer, we will make it blue. I will paint with a special dye purchased at the store.
6.When the resulting liquid has cooled, you can add fragrance to it and pour it into the mold.
7.In order to ensure good adhesion, you need to scratch our snowflake with a toothpick. Sprinkle with alcohol and pour. Spray with alcohol again to remove bubbles.
Well, that's all, you can wait until the soap hardens and you can take it out. How to make soap from baby soapMany people want to try to start making soap, but buying bases and other things is problematic. So if you want to do something useful for yourself, you can use children's. You'll need
Preparation1.Grate the soap and place the plate in a water bath.
3.Pour one tablespoon of oil and mix.
4.Add pink clay, diluting it with water in advance. It will add color and better hold the consistency together. You can also use cocoa, turmeric, orange zest, etc. for color.
5.The next step will be flavoring, no more than 10 drops. You can use essential oil.
6. Take children's sandbox molds and put the resulting mixture into them. To get rid of voids, shake the mold a little.
7.Be patient and leave to dry. After a day, you can carefully remove it and leave it until completely dry for 1-2 days.
Well, that's all. I hope you liked the article. You can leave your questions and suggestions in the comments. Secrets of soap making
Several beautiful options
2.Heart
4. Starfish
5.Ice cream
6.Butterflies
I wish you good luck in such an interesting business! |


 What is the reason for such popularity?


| Read: |
|---|
Popular:
New
- Law on microfinance activities and microfinance organizations
- Receiving an extract from the BTI technical plan Fill out form OS 1b
- How to fill out a notification about taxable objects for property tax Notification about selected taxable objects
- Salads with red beets
- How to prepare raspberries for the winter: we share the best recipes for jams, compotes and freezing
- Russian breakfast: millet porridge with milk and pumpkin
- A simple recipe for shanezhki with step-by-step photos How to bake homemade shanezhki from cottage cheese
- Beet salads: delicious recipes with photos
- How to cook cutlets with eggs inside
- Cake shou “Saint-Tropez French cake shou recipe


