Sections of the site
Editor's Choice:
- How to feed a hedgehog at home?
- How to make a poster with chocolates and inscriptions with your own hands?
- DIY hazel onions
- What you need for a picnic
- Pike head ear
- Rating of winter lures for perch
- How to salt pike caviar
- How to make cheese at home - recipe
- How to care for a hedgehog at home
- How to make a hunting bow with your own hands?
Advertising
| How to make a bow with your own hands: a detailed master class |
|
To craft a bow, you must have the following set of tools:
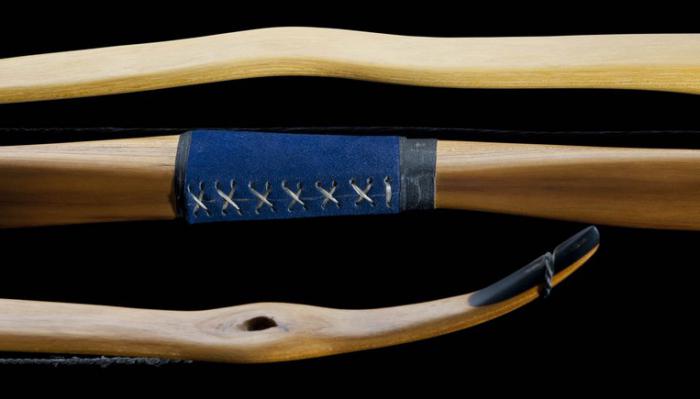
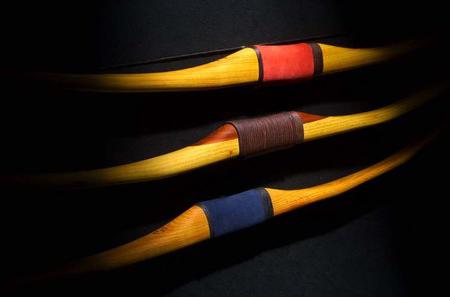
This is the basic set. However, in the process of work, everyone individually chooses additional tools for themselves, with the help of which wood processing becomes easier and more efficient. What can you make a bow from?In the CIS countries, many trees grow from which you can make an excellent onion: ash, oak, poplar, maple, elm, pine. All of these breeds are perfect for making your dreams come true. However, it is not enough to cut down a tree; you need to be able to process it. Material preparationHow to make a good bow? First of all, you need to know the structure of the wood. It has dark inner rings (this is an already dried part of the plant) - these areas are hard. Then there are lighter layers - sapwood. Here the wood is less dense, but more elastic. The bow has two surfaces: the one facing the archer is the belly of the weapon. It contracts when the string is pulled. The flank is the back of the bow and stretches when fired. In order for the weapon to serve for a long time and regularly, during the manufacturing process, you need to find a balance between sapwood and old wood fibers. The bow should have a light and elastic back, and the belly should be dark, capable of providing rigidity. So, in the forest, you need to find a tree with an even trunk, the length of which is two meters, and the diameter is at least 10 cm. Having knocked it down, you need to varnish or glue the cut as soon as possible. This is necessary in order to close exposed wood fibers and prevent cracking. Then we put the workpiece in a dry place. There she must lie for at least three weeks. If the onion is not urgently needed, then it is better to prolong the drying process (be sure to keep it in such a sealed state). The longer it stays, the better. After such preparation, the bark is removed, but not completely: you need to leave part of it - ten centimeters - from each edge of the workpiece. And again put the barrel to dry for about a week. This is the minimum period for which the workpiece will dry out. If you hurry, the bow will turn out bad. Ideally, it is better to cut out a suitable tree in a year, seal the fibers on it and put the trunk in a dry place where there is no sub-zero temperature. During this time, the tree will dry enough for subsequent work. In the meantime, it dries, you can figure out how to make a good bow. First stageWhen the material is dry, you can start working. Examine the workpiece carefully. You need to select the part where the annual rings are thinner (usually the north side). At this point, the structure of the wood is much denser, and the bow will then be biting. You need to saw or split the workpiece in half. If there are a lot of knots on the trunk, it is better to saw it. It is better to prick only when this procedure has already been carried out by you more than once. If you are going to do this for the first time, it is better not to risk it and spend time cutting. Indeed, during a split, if something goes wrong, you will have to look for new material and dry it for at least a month, and the question "how to make a homemade onion" will remain closed for this time. When the workpiece is divided into two parts, it must be allowed to rest. It is best to hang it up and tie a load (at least 20 kg) to the bottom edge. This is necessary so that the tree does not lead when it dries. So the workpiece should hang for a week. If you initially dry the wood slowly, over a year, no re-drying is required after sawing. So it is better to prepare two barrels: make a quick-drying bow from one, and leave the other for a more professional weapon. Subsequently, it will be possible to assess the quality of the two products. Then you will know exactly how to make onions at home, that is, which drying process will provide you with the ideal material. Onion shapingAfter the workpiece is completely dry, you can start creating the shape of the future weapon. It is necessary to mark the middle of the workpiece (where the boom will be inserted), and also determine the dimensions of the future handle. When everything is marked out, you can carefully start creating the base of the onion. Using a plane or knife, carefully remove the excess layers of wood from the belly of the future weapon. From the handle, you need to gradually decrease to the required shoulder thickness. In order for the bow to bend evenly, you need to remove excess layers of material from both shoulders of the product. Checking Shoulders for IdentityCut off the layers of wood from the belly of the onion carefully, avoiding chips. In such a case, it is imperative to use a sharp instrument. So how to make a bow with your own hands? To give the weapon the correct shape, it is necessary to achieve perfect symmetry. Therefore, the identity of his shoulders will have to be determined not only visually. You need to make a so-called test bowstring with many loops. All of them are located on the same side and at different distances from each other. As you cut the material, you need to check how the bow bends by putting on a test string. When the shoulders are thick enough and do not bend, check with the extreme loops. Gradually, cutting off layer by layer, the bow can be pulled tighter, each time changing the loop to a closer one, until the product takes on the desired shape and tension. Checking the back of the bow for bendingSuch a procedure is necessary not only in order to check if the shoulders are bent the same, but also to determine where this occurs. After all, it is almost impossible to predict the place of the fold, and for a person making a bow for the first time, it is generally unrealistic. It is possible that visually the product will be absolutely even, but the structure of the tree is uneven. The bow can bend in a completely inappropriate place. Therefore, it is worth checking it for bending, as well as marking with a pencil the places where you need to cut off the excess. When finishing, it is better to use a file to remove thinner layers. A diamond-shaped tool is ideal - it is shaped like a knife, but does not leave chips or burrs. As you can see, the question "how to make a bow with your own hands" is not as simple as it might seem at first glance. The process of creating weapons contains many nuances, and only after understanding all the intricacies, having felt the material from which you are going to craft, having studied its characteristics and principles of working with wood of different species, you can be sure of a positive result. Knots processing
Initially, even when drying the workpiece, the knots do not need to be removed in any case; they can be simply shortened for ease of use. If you cut them to the level of the trunk, they will immediately crack, which is very bad. When creating a bow, knots must be processed very carefully, because deep chips can appear on them, even when working with a well-sharpened knife. It is better to unfinish all protrusions of this kind, and then simply grind with sandpaper. Making a bow handle
The rough marking of the handle is already there, now it is worth working it out more carefully. It is necessary to determine the upper and lower shoulder of the bow. After that, from the side of the lower shoulder, we outline the handle. We just grab the workpiece and mark the borders on our hand. Having created the markings, we make a transition from the handle to the shoulders. During this critical process, you need to check how the bow bends using a test string. At this stage, you need to do everything clearly and gradually, because this is already a refinement and adjustment of the product. Check shoulder curves as often as possible. When everything is ready, you need to determine the place on the handle for the boom. To understand where it is, you just need to, as the hunters say, "shoot" the weapon. We take a bow and train for quite a long time, firing arrow after arrow. Believe me, the bow itself will tell you everything. Only in the process of training will the secret of the tree be revealed ... So, we practically figured out how to make a homemade bow at home. There are little things left. Decor
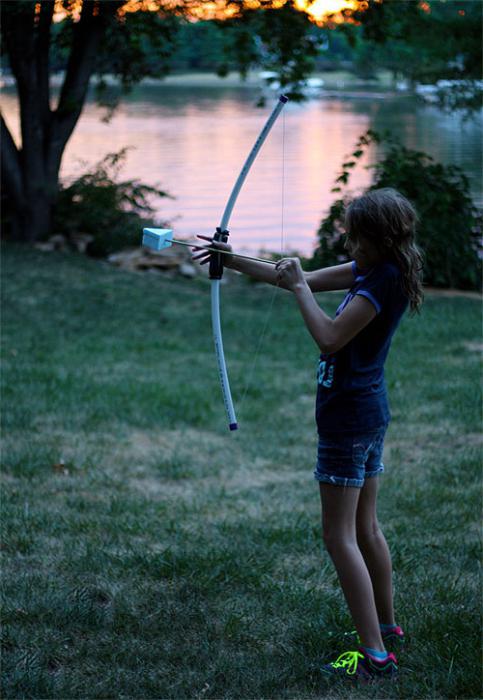
After the bow is made (the tightness is good, the bow itself is boldly biting, and the look is excellent), many will want to wax and varnish it right away. But you need to remember that this is your first home-made weapon, you still have very little experience, and therefore it is not yet possible to judge the dryness of the wood. In order to know for sure that the product is uniquely dry, you should not immediately cover it with anything. Let it be like this for another half a year - unadorned. Yes, you can, and even need to use it for its intended purpose, this is a full-fledged onion, but it is better to wait a little and make sure that there is not a drop of moisture in it. But when confidence in its technical perfection comes, then you can already decorate your masterpiece. And tell all skeptics how to make a bow with your own hands, and even so powerful and beautiful! For those who like to craft something out of nothing ...An alternative to a real wooden weapon can be a PVC pipe product. Of course, this is not quite right, but for lack of the best ... So, what do we need and how to make a bow out of a pipe? More on this later.
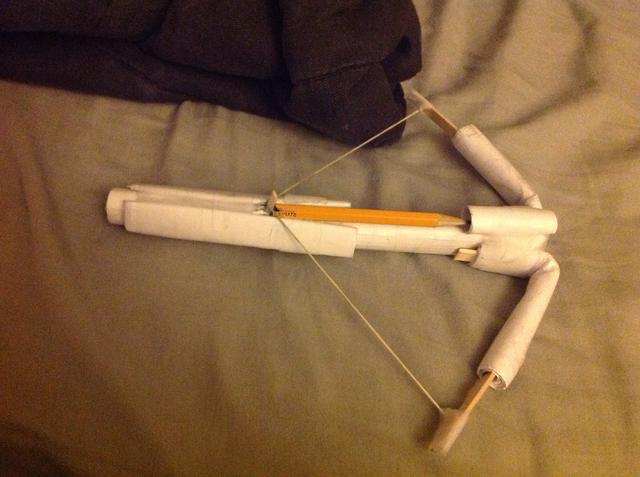
This is how you can make a bow from PVC pipe. By the way, they shoot quite powerfully. Paper crossbowNow we will describe how to make a bow out of paper. Yes, even it can make a great toy for children. So, we make a crossbow.
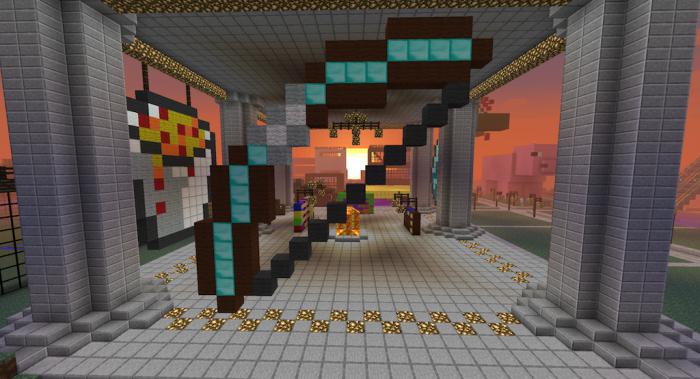
Now how to make a diamond bow in the virtual world of games
In one of the most popular games, which is Minecraft, you can only kill enemies from a distance with a diamond bow. However, it is still needed, and most of the players do not know how. Thus, this is a fairly popular question among gamers today. In the game, sticks are used to create such weapons, as well as a web that replaces a bowstring. We arrange the ingredients for the stick in the following order: 2, 4, 8, options 2, 6, 8 are also possible. For the cobweb string - 7, 4, 1. The bow is ready, arrows remain. They are made quite simply, as an ingredient - feathers. We build a model of the bow: feathers - 1, stick - 2, silicon - 3. That's it, the diamond bow is ready. Here we discussed the making of a large English bow. Then we looked at how to make a simple bow from a PVC pipe, then we made a children's crossbow out of paper. And finally, we did not forget about gamers, creating a diamond bow in the most popular game to date. Be creative! |
| Read: |
|---|

New
- Alexander Green, short biography Post about Green's life
- The most interesting facts from the life of Van Gogh Biography of Van Gogh and his paintings
- Masha Mironova - the true love of Peter Grinev and the moral ideal of the writer
- Exupery was born into a hereditary family
- «Garnet bracelet Description of the appearance of a fan of Vera
- Poverty is not a vice.
- Frederic Chopin - biography, photo, personal life of the composer Where and when Chopin was born
- Nikolay karamzin short biography
- Characteristics of Olga Larina
- Extracurricular reading lesson based on the play by alexander vampilov "duck hunt"


