Sections of the site
Editor's Choice:
- How do sports bettors live and how much do they earn?
- Mikhail Saltykov-Shchedrin
- Nosov Nikolay nosov stories about friendship
- School encyclopedia Founder of constructivism
- Constructivism in building architecture Early constructivism in architecture
- How to draw a teddy bear with a pencil step by step Draw a teddy bear with a pencil step by step
- Rock musicians The most famous rock musicians
- Yulia Mikhalkova - photos of the participant of the show "Ural dumplings" before and after plastic surgery
- Julia mikhalkova, biography, news, photos
- Eternal youth: pages of history of the Palace of Pioneers Palace of Pioneers rent
Advertising
| A cap made of colored paper. How to make a garrison cap out of paper. Master class with a photo. |
|
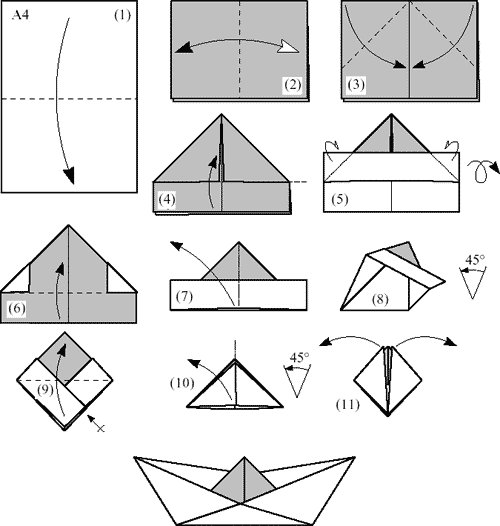
Summer is a great time of the year when you can play outside from morning till night. The only problem that worries everyone and everything is the scorching summer sun. Often, mothers complain that children do not want to wear hats, caps or. We offer you a simple but very effective solution of this problem, which consists in making paper caps with your own hands. The paper cap has worked well as a cheap and practical headgear. Several generations have worn caps in summer and labor camps, and the most interesting thing is that children always wear this headdress with great desire. Probably not all parents remember well how to make a paper cap. Today's master class is devoted to exactly how to fold a paper cap. Soldier's cap made of paperA soldier's cap made of paper can also be made according to this scheme. 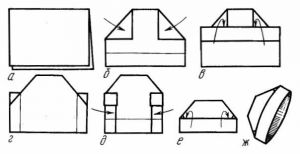 How to make a garrison cap out of colored or plain paper?Making paper caps is an interesting activity for younger children school age... Once they see how to make a cap, they will be able to repeat this simple task themselves. So, take a sheet of A4 paper and fold it in half. Then we bend both corners to the center, getting a pointed workpiece. Bend the strip on one and the other side of the cap under the bent corners. Now you need to bend the small corners along the edges of the workpiece on one side and the other. Now we open the cap, turn it and fold it into a diamond. We bend the two lower corners of the rhombus upward and get a nice garrison cap.
We make a rain hat, a chef's hat and a garrison cap from one sheet of paperAnother option for making a garrison cap from colored paper. At first, all actions are similar to the previous method of making a garrison cap. 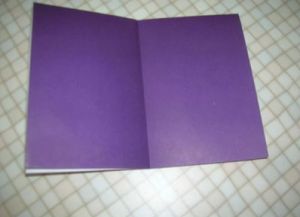 A pilot jacket is a very handy thing if you forgot to collect the entire list from that, if necessary, you can make it from scrap materials and put it in your pocket as unnecessary. Try to make a cap together with your children, and they will be happy to wear such an original headdress. Very often in our life there are situations when you need to get out on the spot with the help of improvised materials. Imagine a situation when, having gone to a picnic or dacha in the summer, you forgot to take your cap with you. A Sun rays find you even under the trees. Or you have started a home renovation, and in order to prevent dust from falling on your head or drops of paint or glue, you will need a hat. In all such cases, you can get out of the situation with the help of an ordinary newspaper. Today we will tell you how to make a garrison cap from a newspaper. Even a schoolboy will not be difficult to make such a headdress. You will need a regular newspaper for this. In principle, any paper is suitable for these purposes: wallpaper, an old wall calendar, and even pages from a magazine. The only difference will be in size. So, do-it-yourself newspaper cap! You need to get hold of a regular rectangular newspaper. If necessary, trim it with scissors, giving the desired shape... The first thing you should do is fold the newspaper in half.
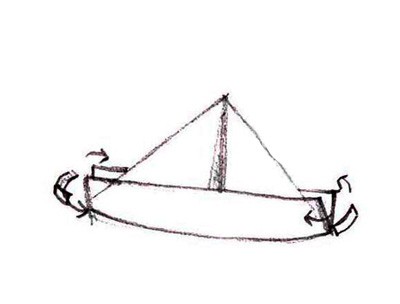
We told you about simple method folding paper hats. There are several options for how to make a garrison cap from a newspaper, but they are already a little more complicated and require some manual dexterity. Practice first on simple things and feel free to move on to complex ones. You can even make a garrison cap out of a newspaper with a visor! Folk art knows no boundaries. Lightweight hats are comfortable in various conditions in order to protect the head. This can be protection from sunlight in order to avoid overheating of the head, or as protection from various pollutants - dust, various small splashes of dirt, paint droplets from a spray bottle during painting; when whitewashing the ceiling, walls above the head.1. Let's make a garrison cap from a newspaper. You will need: newspaper sheet. 1. Take one sheet of newspaper. Usually it is already folded in half, that is, it has a fold along which the newspaper is folded during production in a printing house. Place the folded sheet in half with the fold line horizontally and further away from you. 2. Take the upper right and left corners and fold them into right angles symmetrically to the center, about a third of the width of the newspaper. A semblance of a trapezoid is formed. 3. Fold the loose top layer of the bottom edge upwards so that it folds equally twice. The first time - in half to the bottom of the right angles formed from the previous fold. The second is to repeat the twist by the same amount even higher. The resulting strip will partially overlap the corner folds. The design itself will resemble a boat folded out of paper (see at the end of the post). 4. Without changing the top-bottom orientation, turn the newspaper over to the other side. Thus, only the right and left sides are swapped. 5. Fold back the strips on the left and right, each about one-sixth of their width, so that they form vertical, parallel fold lines. 6. Roll the bottom edge horizontally 2 times away from you. First in half, and in the process of the second turn, insert the first fold of this step and insert it behind the flaps-pockets from similar two turns in the third step of this instruction. The assembly is complete. 7. Give volume to the cap and put it on. A step-by-step scheme for folding the cap is shown in the figure.
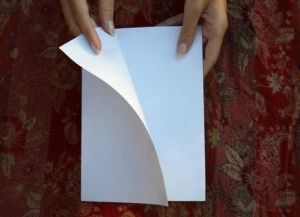
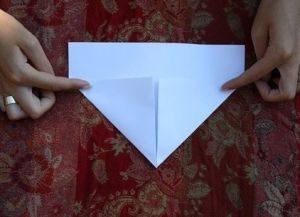
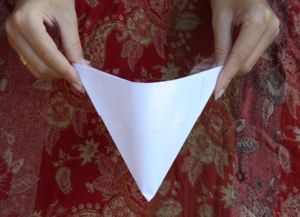
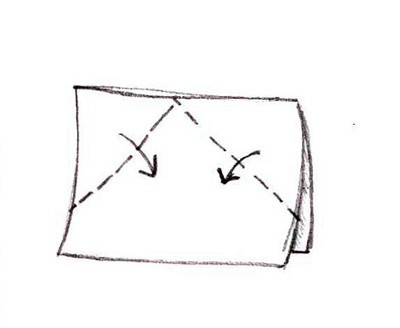
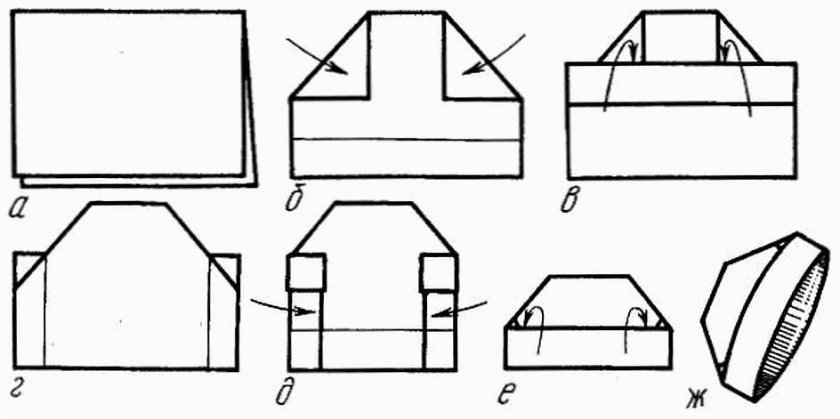
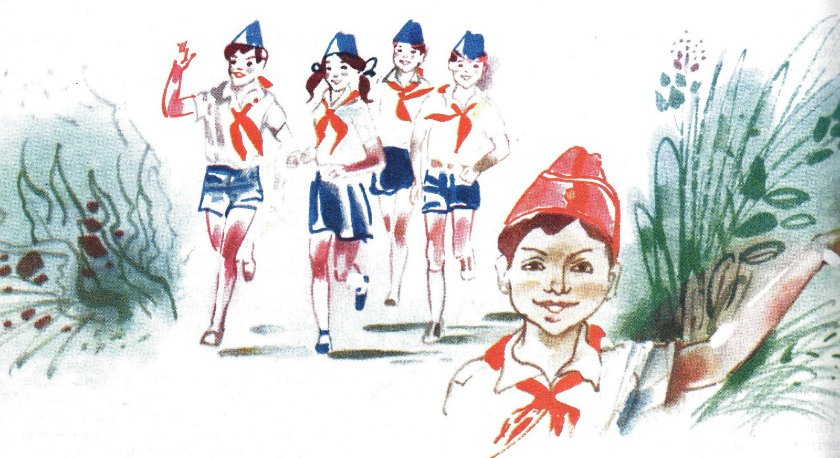
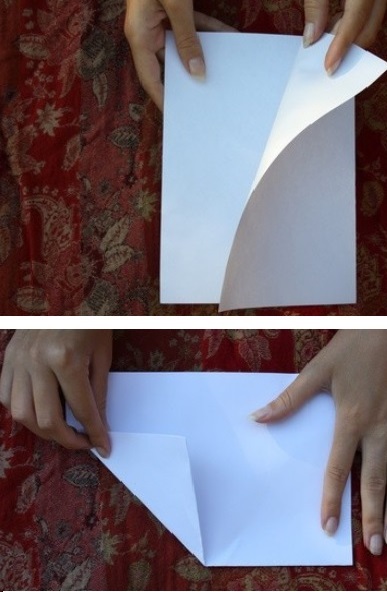
How to make a garrison cap out of paper?Paper is readily available and easy to work with. Beautiful crafts are made from it. Why not make a paper cap with your baby? Time will pass usefully, and the craft will turn out amazing.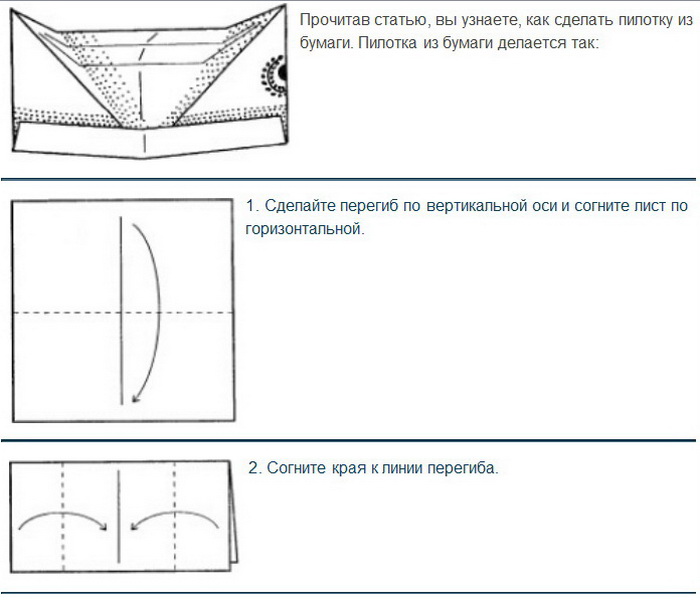 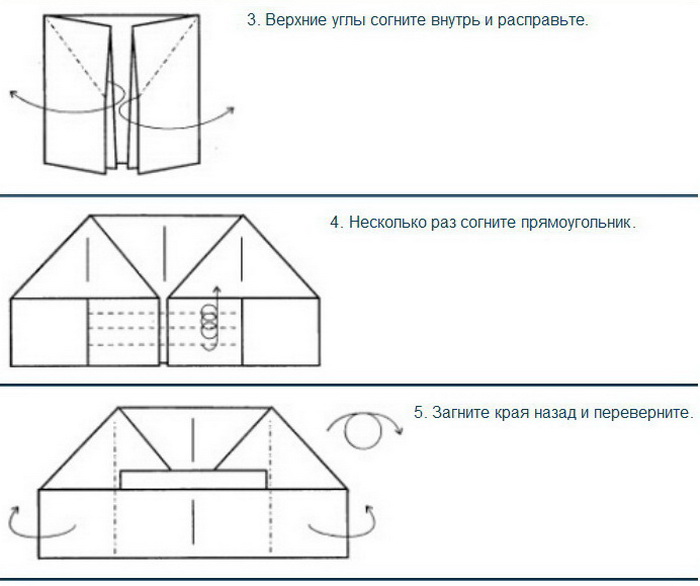 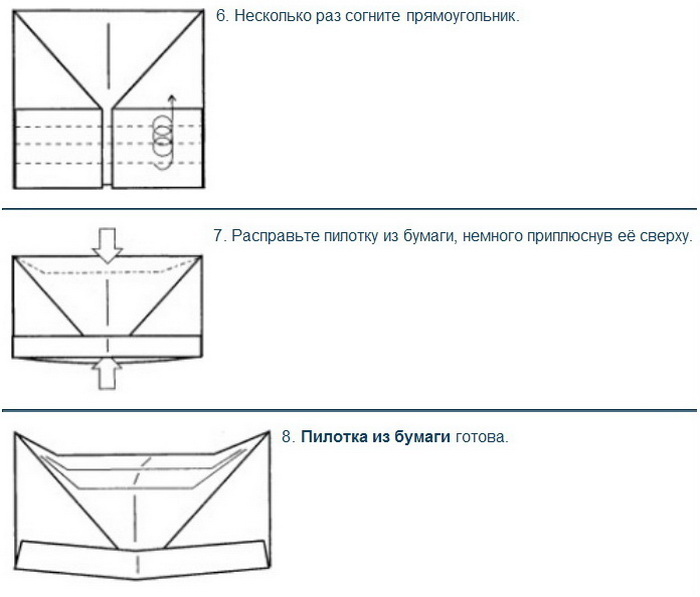 Remember: the seams must be even and neat, otherwise the craft will turn out to be ugly. Helpful advice: To make the paper cap look more elegant and more fun, ask the child to decorate his craft watercolors and let it dry. How to make a garrison cap?Pilot cap is a necessary element of uniform for children. In some schools, children's sports camps, uniforms are still worn, in which, as a mandatory element, a garrison cap is included.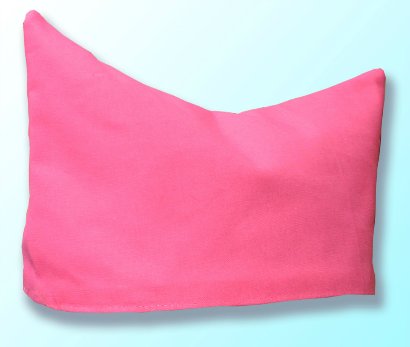 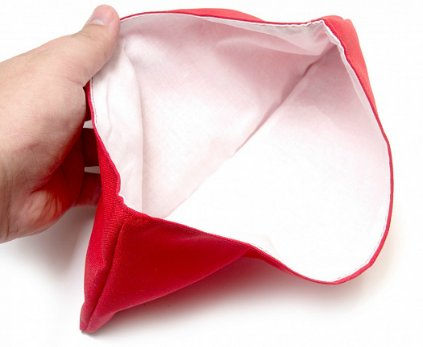  You will need: thick cotton fabric, sewing supplies. Instruction. Take measurements carefully before sewing. Measure the head at forehead and occiput. This will be the length of the cap. Measure the head from ear to ear - this will be the height of our product. 2. Then you need to make a drawing of the headdress pattern on paper. You need to draw a rectangle, where the long side is the length of the garrison cap, and the short side is the height of the garrison cap. You need to draw a pattern according to the measurements taken. Then you can cut out the elements of the product from the fabric. To do this, fold the fabric in half along the transverse thread. Place the pattern so that the long side of the rectangle coincides with the fold line of the fabric. Pin the pattern with pins, cut out with allowances for the side seams 1.5 cm, for the lower cut 4 cm. Sew the side cuts on the machine, it is better to overcast the edges on the overlock machine. 3. Unscrew the cap, iron out the seams. Then tuck the bottom cut 1 cm, press it on, tuck it again 2 cm and sew on the sewing machine. If you need a cap for special cases, you can stick or embroider an emblem on the cut fabric before starting sewing, insert a brush into the seam and sew the lower cut with a contrasting thread. You will get a more festive, elegant version of the cap. How to sew a pioneer cap?One of the most memorable moments of childhood is the pioneer camps. Everyone was obliged to wear a pioneer uniform, the basis of which was a red cap.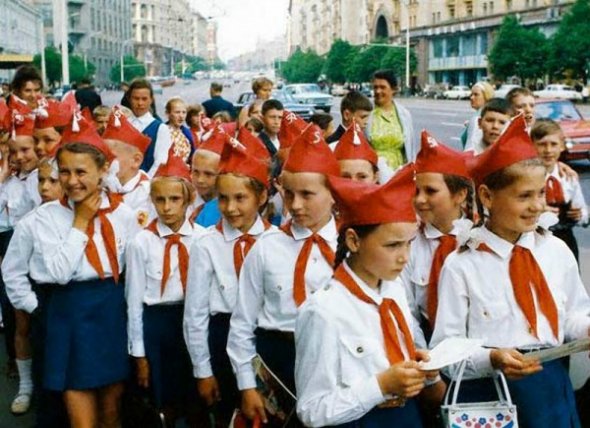  You will need: satin of bright colors, sewing accessories, measuring tape, threads for embroidery. Instruction. 2. Carefully pin the pattern to the fabric with pins and trace around with chalk or tailor's pencil. Cut the material taking into account the seam allowances. Sweep by hand the parts of the cap and try on the workpiece, if necessary, adjust its dimensions by decreasing or increasing them. Then carefully sew all seams on the sewing machine. Overlock or zigzag the edges of the fabric. 3. Often, the emblem of a camp is embroidered on the cap. Her drawing is prepared in advance. Often, the best is chosen by competitive voting, and then I embroider it on all caps. This can be done using absolutely any seam: looped, stalked or tambour. Transfer the design of the selected emblem onto fabric using carbon paper and embroider it. 4. Even the simplest garrison cap can be decorated with a hand-made or ready-made thread border. The sewing technique can vary from the skill of the master and his imagination. Baste the border or braid by hand to the edge of the product or just above it, and then sew on a typewriter. Iron the finished product thoroughly. Garrison cap patternSuch a cap can be made as a military cap, a pioneer cap, a cap for children or a flight attendant cap.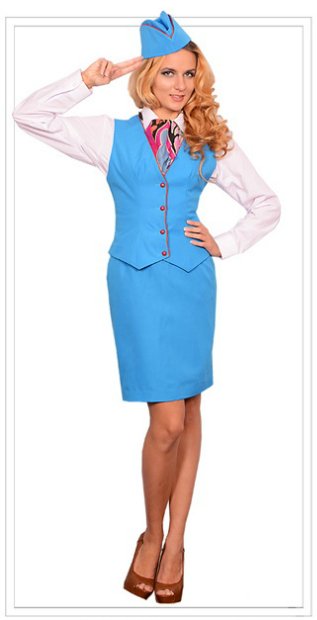 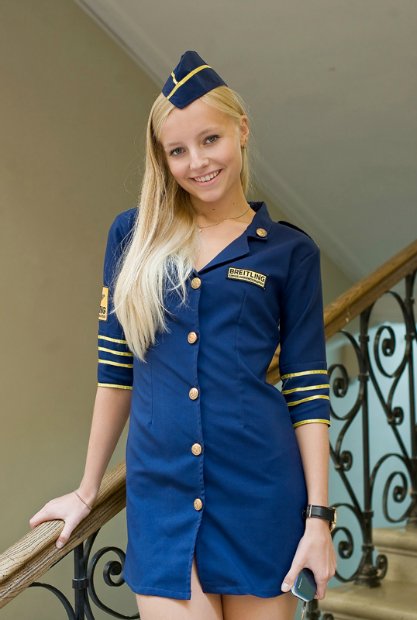 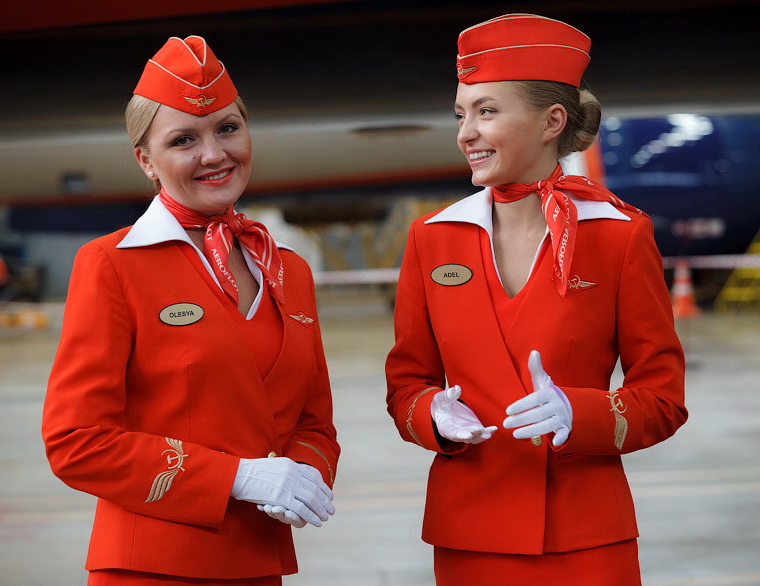 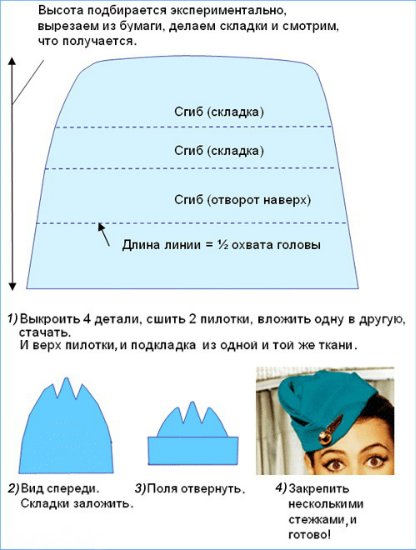 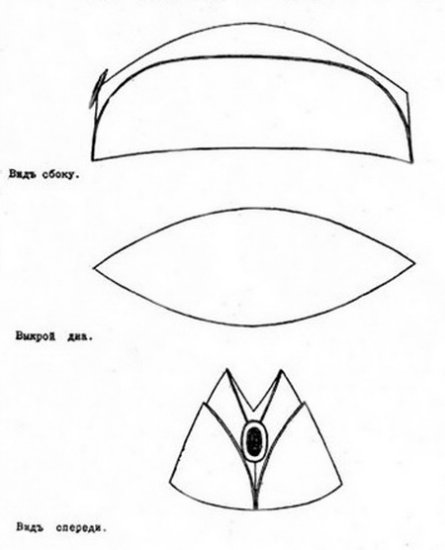 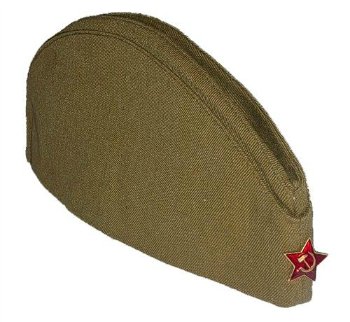 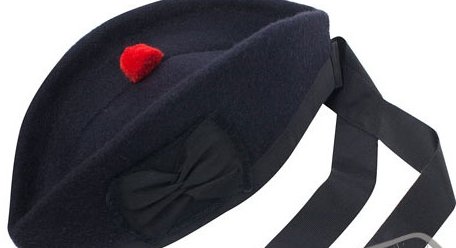 The pilot can be sewn or knitted as in the photo below (hook, single crochet):  The pattern is simple: 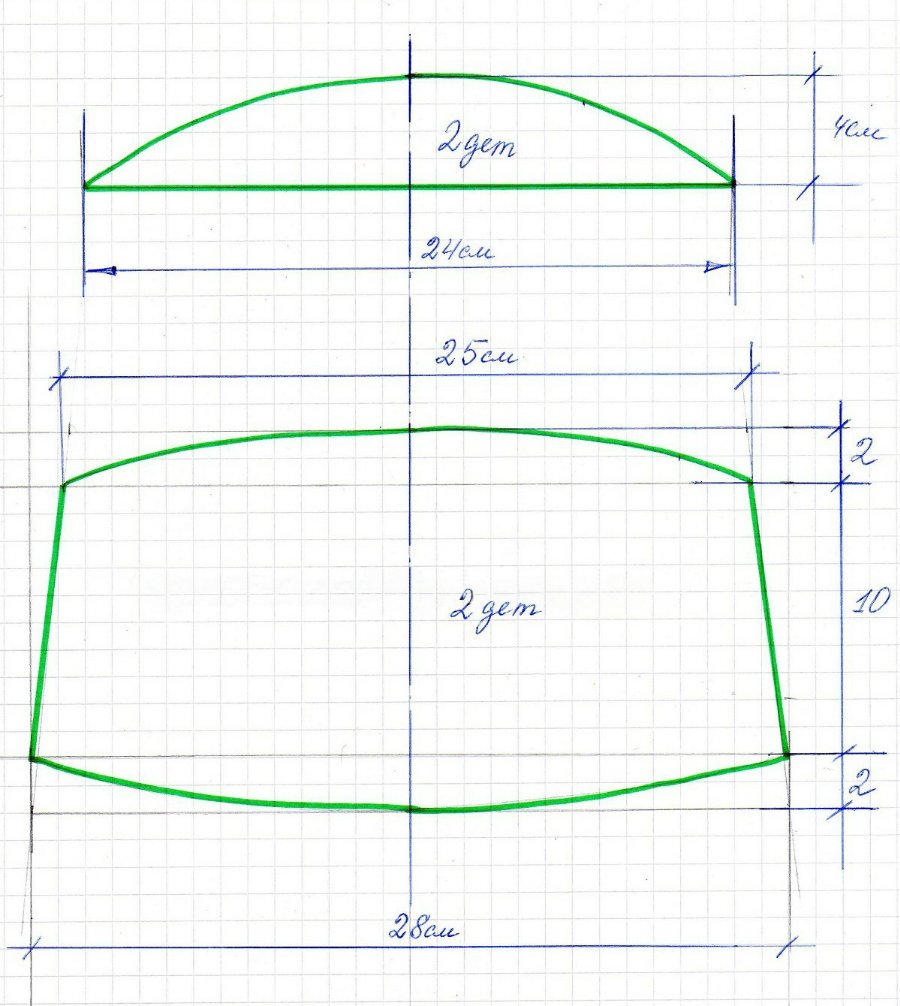 The pattern is given for a head size 56 - 57. For the rest, reduce or increase proportionally. If desired, the height of the cap can be slightly increased. You can add a lapel. There is a more complicated version of the cap: 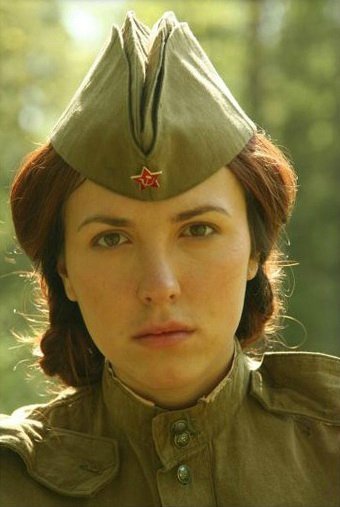 In this case, you need to cut 4 small elements that are on the pattern, and make them seem to be nested in the main part. To do this, on top of it, 2-3 cm edging should be made, to which the upper double element is sewn. And as a bonus - how to make a children's boat out of paper. Remember? The site's blog provides instructions on how to make a hat from a newspaper - a cap with a newspaper visor. But such a cap requires a full-sized sheet of newspaper for production, and it, as an evil, at the right time of a hot day may not be at hand. Compensating for this drawback, consider a method of assembling paper caps from a half-format newspaper sheet - caps. The pilot will also protect your head from the sun well. A variety of free and advertising newspapers are suitable for production, which can be found faster in a difficult situation. This design of the headdress is found in the protagonist of the film "Kin-dza-dza!" Stanislav Lyubshin, who played the uncle of the Soviet engineer Vova... Digressing from the topic, the 1987 film not only looked into the present of that country, but also showed our future, today's present. How well the phrase from the film "If there is no color differentiation of pants in society, then there is no goal!" Instructions for assembling paper caps1. A half-format newspaper spread is required. V this option the garrison cap is assembled from a sheet of full format newspaper folded in half. 2. Step by step instructions I fold the caps from the newspaper with my own hands are shown in the photographs. With the appropriate skill, the cap can be assembled in the appropriate size. In step # 5, the length of the bottom hem in centimeters multiplied by two will give the size of the headgear. The size of the cap can be adjusted within small limits at step # 3 and # 5, or set thoroughly at step # 1. Harvesting cap In the summertime, when the sun's rays scorch especially strongly, it would be nice to cover your head with a hat. Since in nature or in the country a cap may not always be at hand, you can use the knowledge acquired in childhood about how to make a cap out of paper. This process will take no more than two minutes, it is very easy to make it. You can see for yourself by looking at the instructions below. Making a paper cap step by step instructionsTo begin with, you should take a piece of paper, or a newspaper page (in this case, the size of the garrison cap will be just right) and fold it in half.
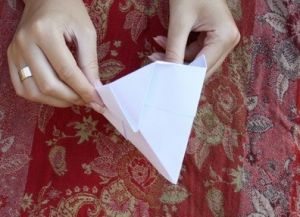
After that, you should bend one of the corners to the center. The same actions are performed for the second corner.
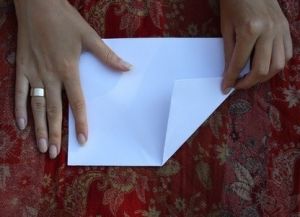
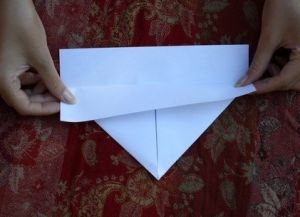
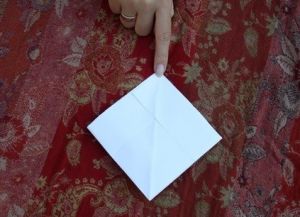
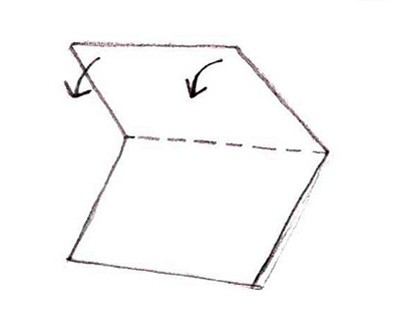
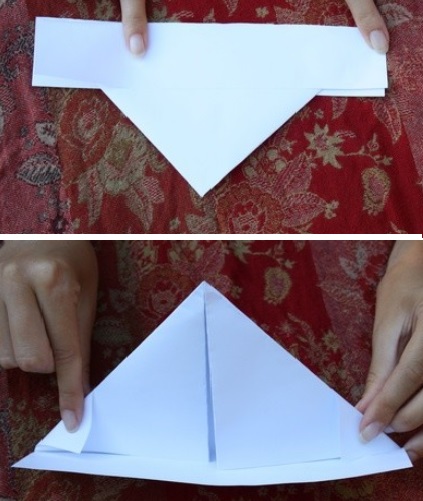
Now, at the bottom of the bent corners, bend the strip upward. We do the same on the reverse side.
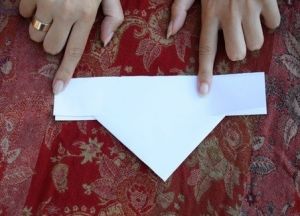
In the next step step by step guide on how to make a cap out of paper, fold the small corners from the edges.
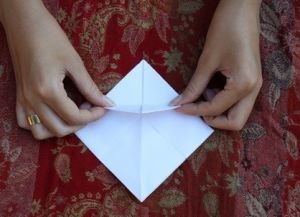
As before, this operation is repeated on the other side of the workpiece.
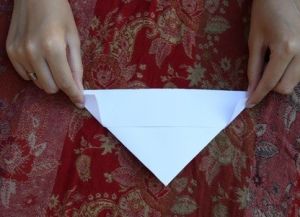
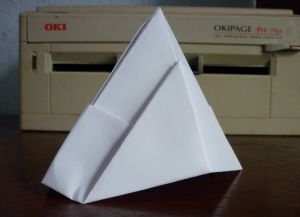
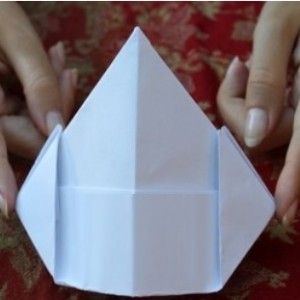
Now we fold the first bottom corner.
As you may have guessed, the second corner is folded from the back. Well, at the last stage, the cap is given volume.
Now you know how to make a paper cap with your own hands. It will save you from the heat, and certainly unpleasant things like sunstroke. Video: how to make a garrison cap out of paper
|
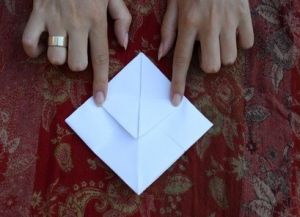
 You should have a strip of paper at the bottom. How to make a garrison cap from a newspaper can be seen in the pictures that are presented in the article. The next step is to wrap the free bottom of the newspaper up. Do this first on one side of your future garrison cap. Run your finger well along the fold to secure the paper. Turn the resulting product over and bend the free strip of the edge, as you did with the first side.


Popular:
New
- Learn to draw a human hand
- Drawing anime character with a pencil step by step for beginners
- My Little Pony drawing lesson step by step
- Learning to draw Santa Claus correctly
- How to draw Santa Claus and Snow Maiden master class for beginners
- How to draw animals in stages with a pencil for beginners
- How to draw a dinosaur with a pencil with children How to draw a dinosaur to a child in stages with a pencil
- We teach children to draw different animals in stages
- How to draw military equipment?
- Learn to draw doll faces


