Site sections
Editor's Choice:
- Lamb with potatoes and onions in the oven recipe
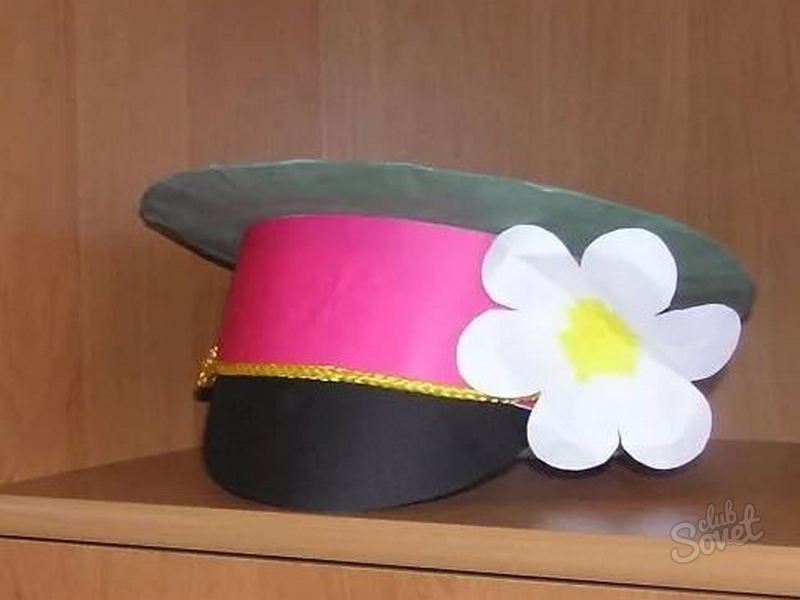
- Police hat with their own hands: pattern, tips on sewing
- Name of insect body parts
- Choice of spinning for jig fishing
- What is the barley ripening period?
- Cooking chicken goulash
- The nature of the people in the form of hands
- Insidious doubles from the book: Green Pages
- Basketball rules: basketball referee gestures
- Nemo fish in the home aquarium
Advertising
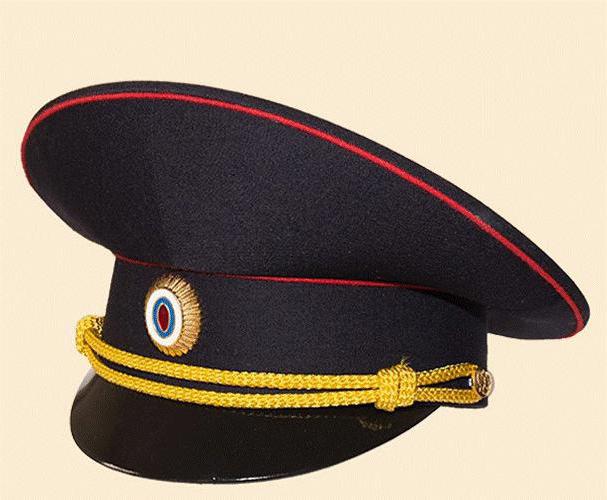
| Cap from the newspaper video lessons. Police hat with their own hands: pattern, tips on sewing. |
|
Boys - lovers to investigate the most incredible mysteries. Often they see themselves in the role of firefighters, rescue workers and, of course, the police. In the carnival costume of a policeman one of the main attributes is necessarily included - this is a police cap. You can do it yourself at home. But for this you need to work a little. If the matinee is expected soon, you can make a paper cap, it will not last long. A cap from a fabric can be useful more than once, it can be used repeatedly on holidays with dressing up. Parts of the capAny cap is not just a hat. It has a special structure, and each part in it is called in its own way. The police cap has the following components:
We cut out a cap
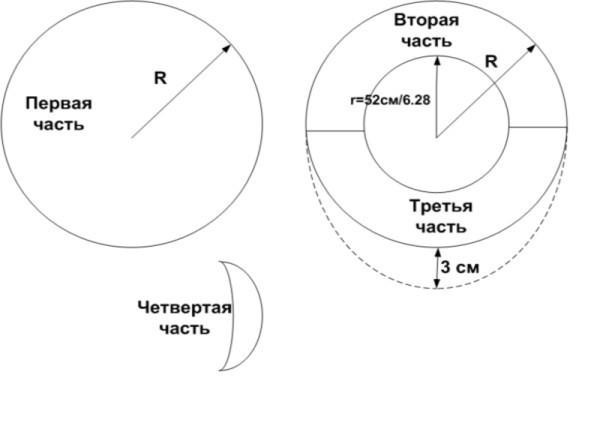
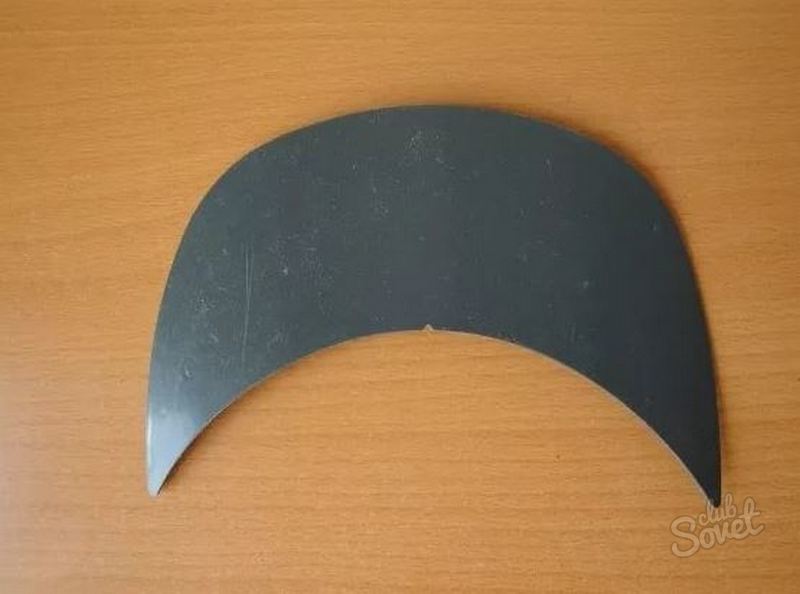
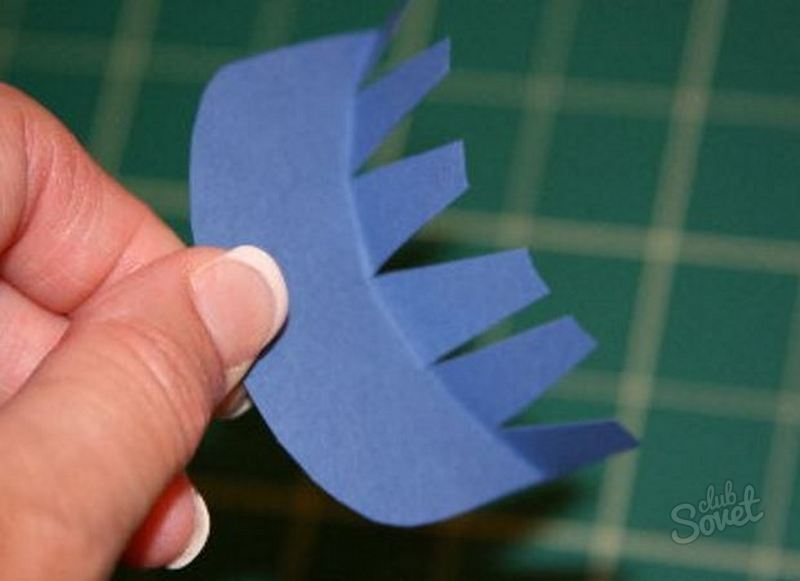
In order to sew the product with your own hands, for work you will need a pattern of a police cap. First you need to determine the size of the head. The circumference can be determined with a measuring tape. To draw a circle on a sheet or cardboard, the circle should be divided by 3.14, then add 4. Get the radius of the circle. A circle is cut and four more details of a semicircular shape for quarters. The inner radius is found by subtracting eight from the outer radius. Cutting around the band, keep in mind that its volume must also be equal to this volume. To him must leave 2 centimeters for allowances. Also need detail for the visor. Make it a semicircular shape, 3 cm wide. How to sew a police cap for a child
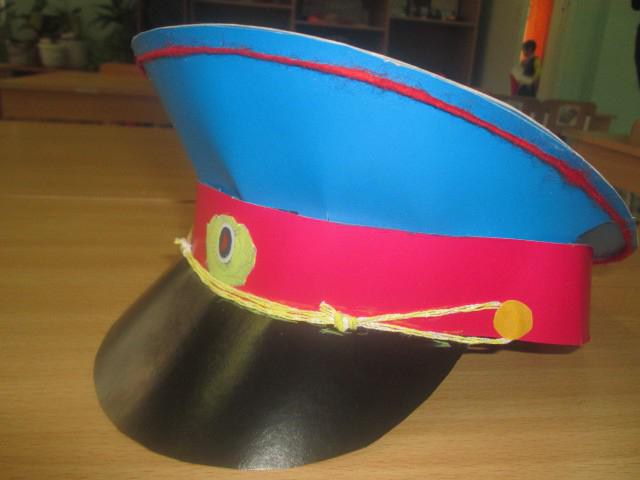
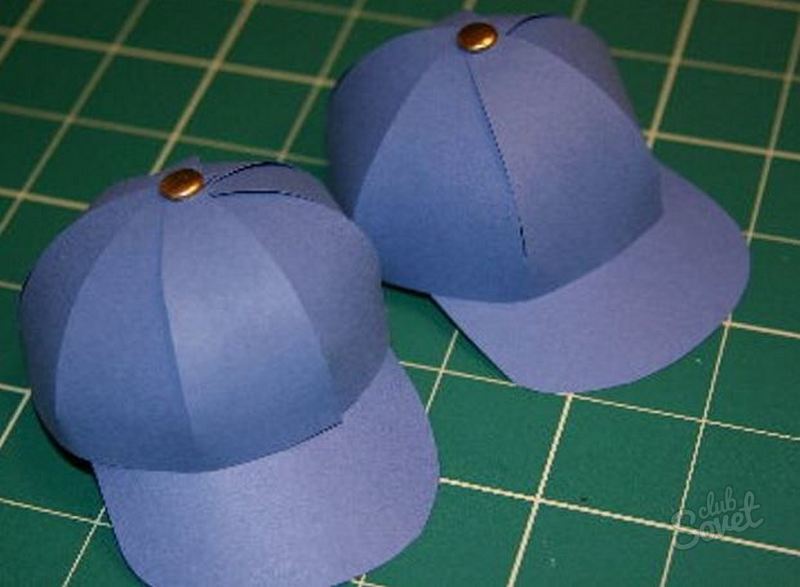
Next, proceed to the sewing itself. The pattern must be applied to the prepared fabric. The police cap is usually black. Transfer all parts to the fabric. For drawing on dark material it is convenient to use chalk for a tailor. Cut out all the elements. It is necessary to sew all four pieces with a circle. The rim is stitched into a ring and inside is reinforced with an insert made of plastic, cardboard, elastic band or elastic tape. In the middle of the band are decorated with decorative elements. A policeman's cap, made by hand, is almost ready. Then you need to sew the details of the visor with the band. So that the visor fits into its place, it looks exactly, make the marking of the places for sewing in advance. This part of the work can be called the most responsible. If the visor is crooked, then the whole product will skew and will look just ugly. The final step is to stitch around the bottom of the cap. The connecting part will serve as a crown. She already laid in parts of the pattern. The product must be turned out and sewn around the band to the inside. Cap ready. It remains to decorate it with interlaced ribbons, attach them in place chin strap. Set the cockade. Police cap with paper
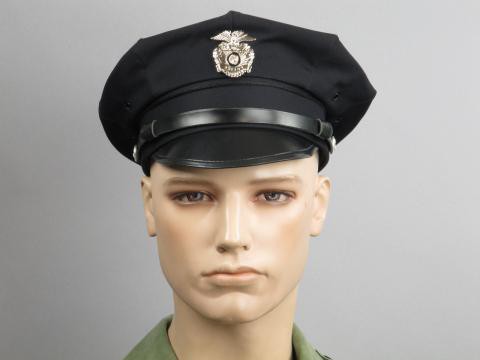
To build a cap from paper with their own hands is not difficult. You will need white thick paper or colored thin cardboard, glue, pencil and scissors. As a pattern, you can take as a basis for the pattern already presented above. First glue around the band. It should be tight and keep well around the circumference of the head. After that attach to the base of the crown. It should be slightly different in height, higher in front, lower back. At the top of the crown it is necessary to leave 1 cm in order to bend this allowance and glue the cap of the cap to it. For convenience, the folded edges can be cut into teeth. The bottom is neatly glued. By cutting a visor out of paper, you can also cut teeth in the inner semicircle on the blank. They will allow you to accurately paste the part, do not crumple it and place it more accurately. Before sticking, make a markup on the band. Do not forget about the decorative elements. A police cap made of paper is prepared quickly and simply, but will not last long. Enough for one event, because in a funny dance among children there are a lot of funny cases. American cop suitMany boys see themselves as a cool cop. The suit of an American police officer is easy to sew with your own hands. As the form itself fit the usual black pants and shirt. The American policeman’s trousers are most often leather, you can pick up an imitation. High boots or boots complement the image of a cop. Must be present cap police officer. For the boy, equipment and equipment will also be of great importance: leather black mitts, handcuffs, baton, holster, stripes. Cap can be sewn on the pattern presented above, it differs only in some elements that can be seen in the photo.
Military capsAs everyone knows, military hats are different. Today we told how a police cap is sewn. For example, sailors wear special caps that are decorated with ribbons. Call them caps, they have no visor. There is another difference. In the summer, seamen wear white caps, unlike military and police officers, whose headwear is not changed all year round. There is a cap from the Cossacks. She completes the image of a brave, dashing warrior. Cossack caps are distinguished by the color of the band. In any case, the headgear of the military should sit well on the head, especially the commander of the composition. It will be embarrassing if he slips over his eyes or slides to the back of his head. A paper cap is an interesting craft that cannot be bought in a store. Such a hat is always in demand, whether it is a New Year's masquerade, a patriotic school event, a summer holiday or home repair. These hats are made, depending on the destination, from newspapers, office and colored paper, cardboard. In this article we will examine a few simple models that will probably come in handy in your daily life. A cap - a uniform headdress of employees of armed forces and departments of many states, among the people - any cap with a visor and band around is called a cap. How to make a cap from thick paperLet's make a cap that you may need at any kindergarten matinee. Prepare: drawing paper, scissors, pencil, ruler, compasses.
How to make a cap from colored paperTo make a cap, determine the circumference of the head and the height of the product.
You can decorate the product with an appliqué, a picture or leave it monotonous - in any case, the cap will look beautiful and original.
How to make a paper cap - newspaper versionFor this cap you need only a newspaper (double format) and some free time.
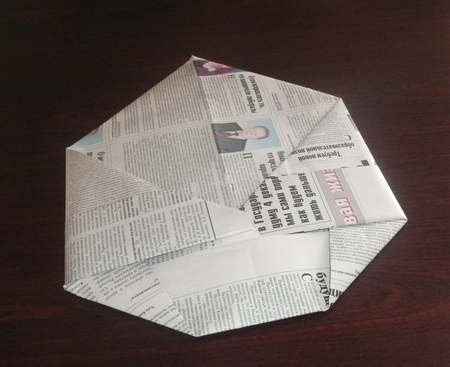
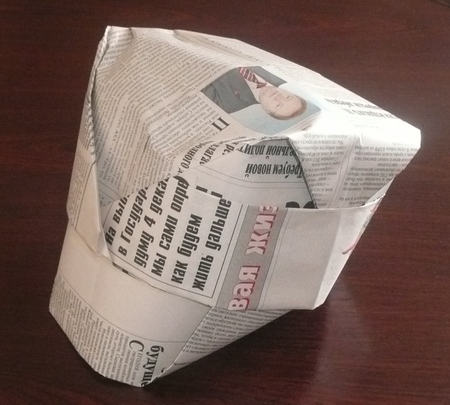
Remove the corners in the folds and brush over the product, giving it shape. If you want a cap to be stronger, make it from wallpaper or wrapping paper, and then decorate it as you see fit.
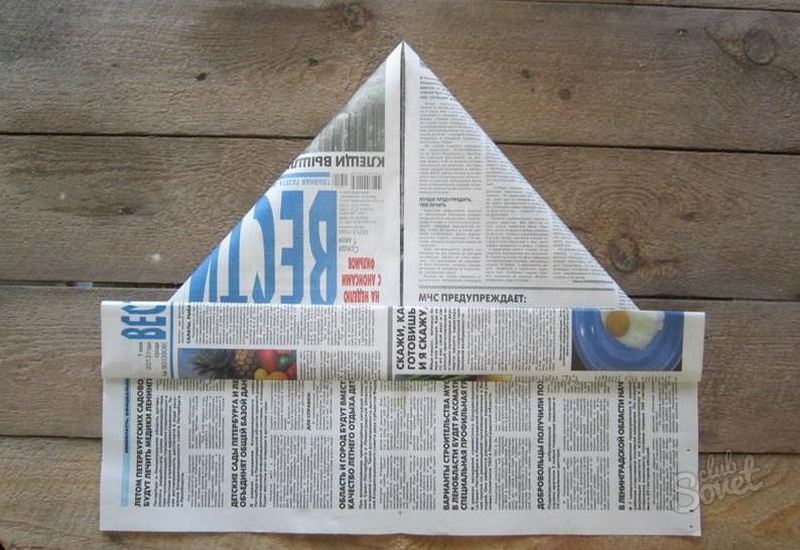
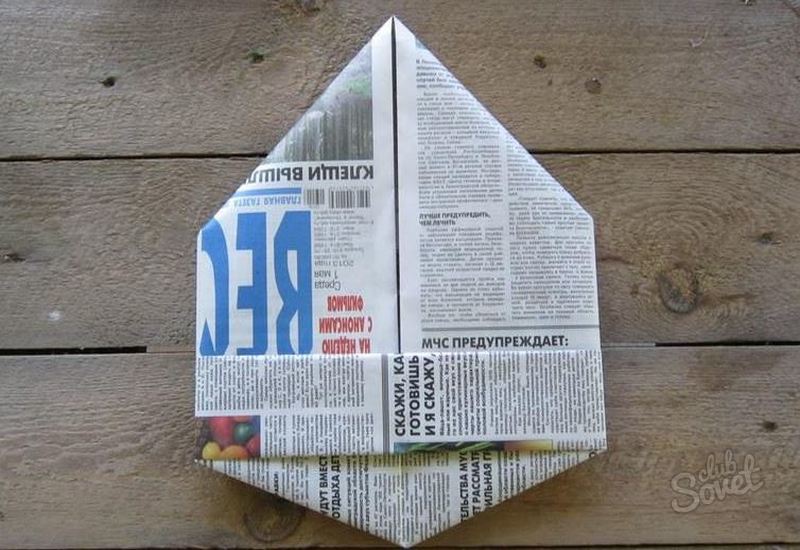
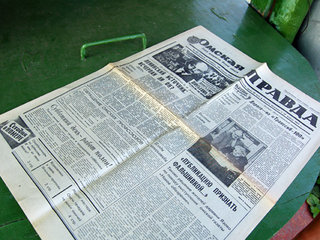
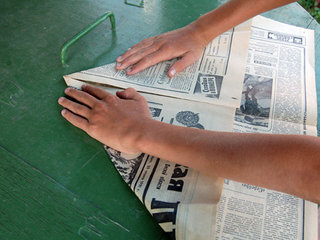
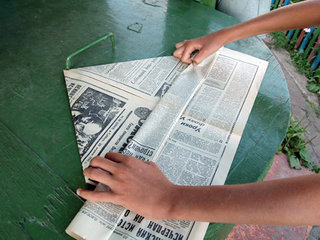
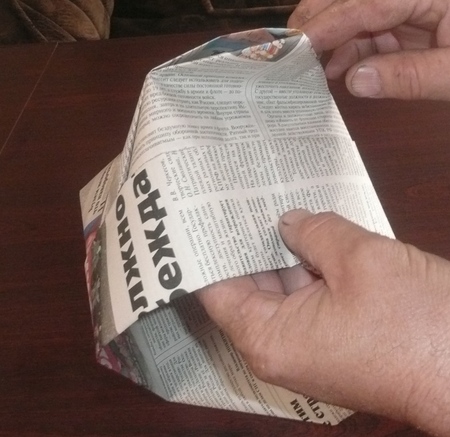
The headdress of paper is done simply and quickly. Of course, a paper product is short-lived and will not be able to serve you for years, but for a one-time event - an indispensable thing. In recent years, we have to admit that a modern backdoor by consumer goods significantly heaps people’s everyday creative beginnings. But the approach to the multivariate use of products and objects, seemingly one-time use, is fully justified and traditional. Let's try to recall one of the most interesting, but lost technologies ... We will visually consider an example of how to make a headdress from a newspaper. Moreover, it is not a trivial Malar triangle or “cowboy hat”, but a stylish paper cap (cap, cap, shako, finally ...) For the manufacture of this headgear will need a newspaper of a large standard format - A1, folded in half. In the above example, this is “Omskaya Pravda” No. 80 for 1991. Nowadays, newspapers, in their advantage, are being published in a smaller, more readable format, but if archival materials were not at hand, find modern large-sized periodicals. So:
2. We make two diagonal folds along the already bent edge from the edges to the center.
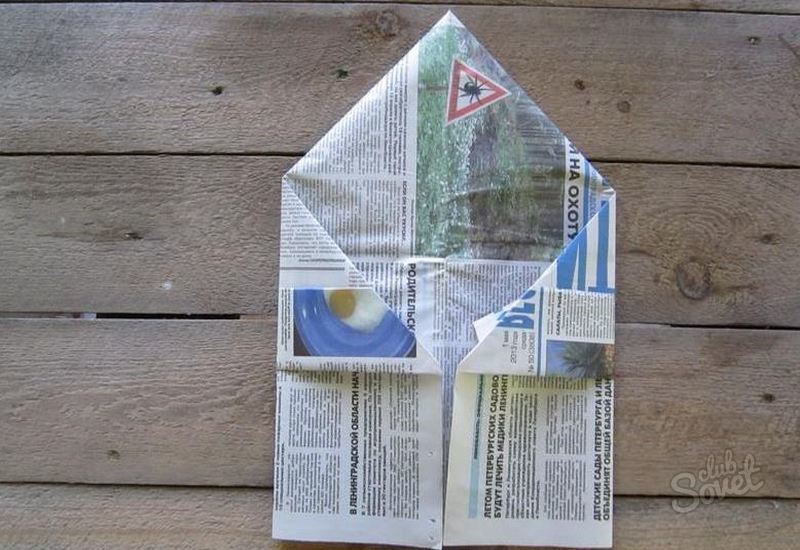
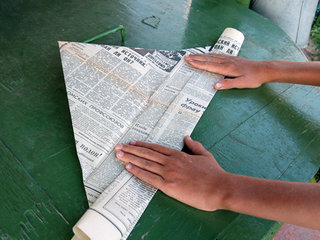
3. The edge of the newspaper protruding from the bottom of the formed triangle is twisted into two folds.
4. Similarly, the second edge.
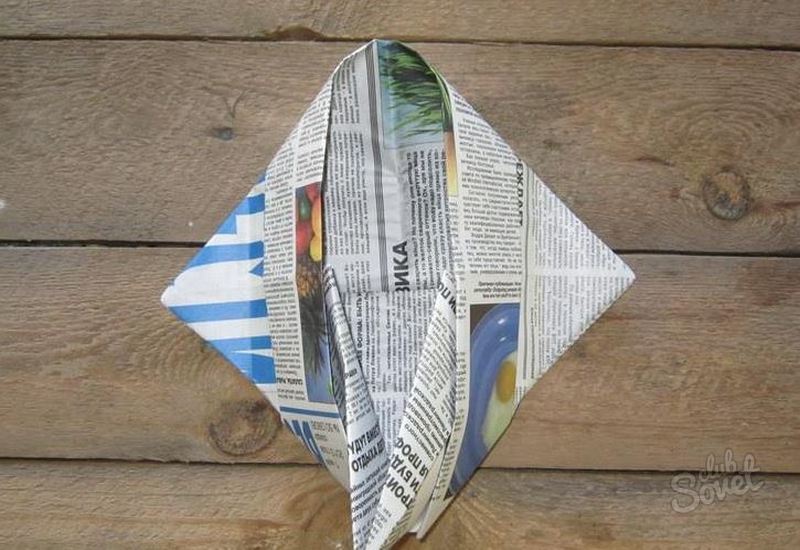
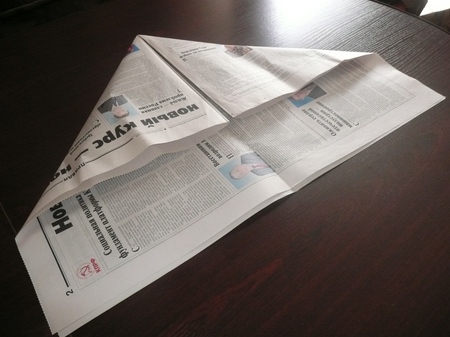
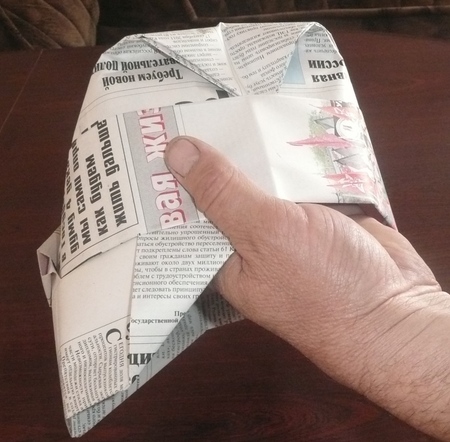
5. We return one of the lower rectangles back - down one turn: from it a visor will be formed. The second rectangle will be the carrying rim "cap" - okolysh. Now the key point: we reduce the right and left corners of our “triangle” to the center and thereby form the size of the headgear. For an adult, the edges that are closed are only slightly overlapped. Just in case, you can do a preliminary fitting at this stage. In recent years, we have to admit that a modern backdoor by consumer goods significantly heaps people’s everyday creative beginnings. But the approach to the multivariate use of products and objects, seemingly one-time use, is fully justified and traditional. Let's try to recall one of the most interesting, but lost technologies ... We will visually consider an example of how to make a headdress from a newspaper. Moreover, it is not a trivial Malar triangle or “cowboy hat”, but a stylish paper cap (cap, cap, shako, finally ...) For the manufacture of this headgear will need a newspaper of a large standard format - A1, folded in half. In the above example, this is “Omskaya Pravda” No. 80 for 1991. Nowadays, newspapers, in their advantage, are being published in a smaller, more readable format, but if archival materials were not at hand, find modern large-sized periodicals. So:
2. We make two diagonal folds along the already bent edge from the edges to the center.
3. The edge of the newspaper protruding from the bottom of the formed triangle is twisted into two folds.
4. Similarly, the second edge. First of all, a paper cap is associated with a children's audience - they are interested in wearing such hats, playing games, presenting themselves as someone. Using only your own hands and a few stationery or art supplies, you can create a whole range of images for your child. The result will be:
You can make all the caps on the same scheme, achieving modification using watercolor paints and buttons, and you can even fold the cap shape in different ways. How to make a paper cap for different images?In order to avoid difficulties, the first time to fold the headgear is necessary in stages, based on detailed instructions. It is best to open the description with a photo or even a video. However, help will be needed, rather, for moms, as fathers also made caps, frogs and other interesting things in their childhood. For crafts it is used:
Before looking for how to make a cap from paper with your own hands, you need to decide for what purposes you plan to use crafts. If for yourself as protection from the sun, then you can get along with a newspaper - such dressing will last no longer than one day.
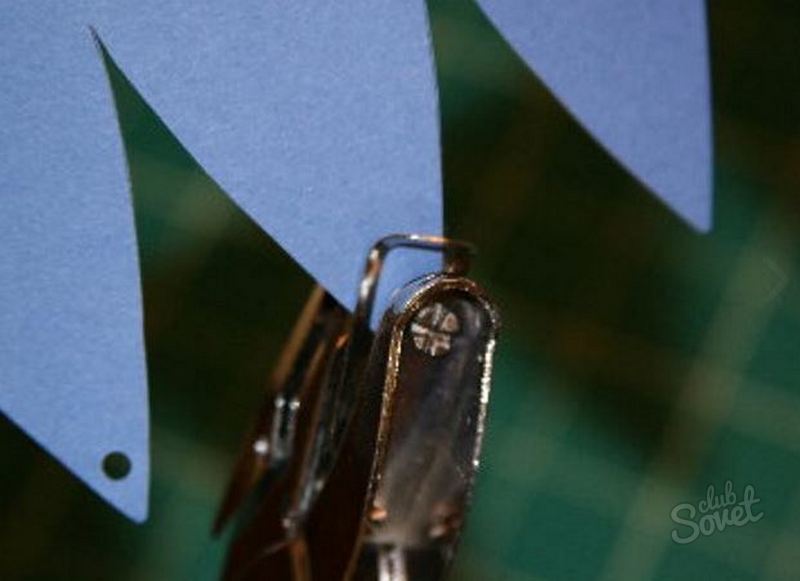
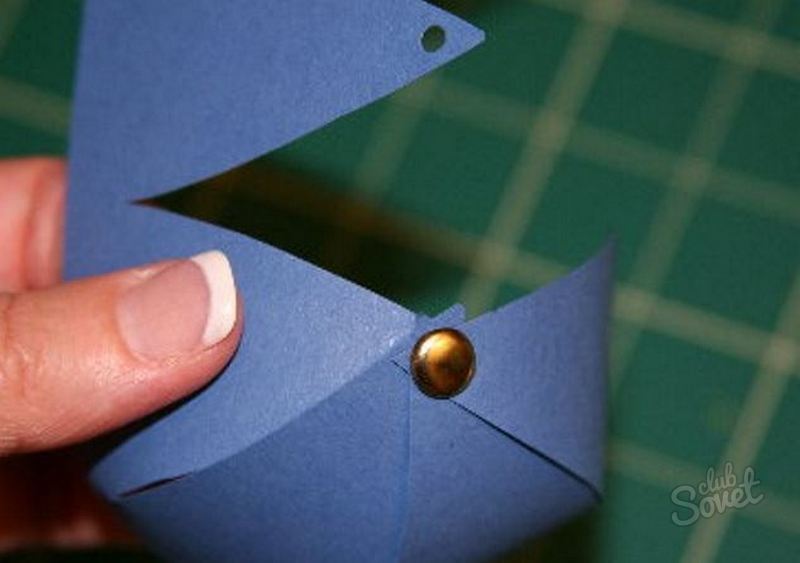
If the caps are made for thematic games, that is, not a one-time use is planned, then you should choose a cardboard. The uniform may resemble a cup, a box, a cap, an army cap, etc. Depends on the form, it will be possible to manage simply by folding the paper or scissors and glue will be needed. Sometimes to fasten the design using paper clips. How to make a paper cap with your own hands quickly and colorfully?The easiest way to get a captain's cap or marine cap is to take a centimeter in your hand and start taking measurements with their further transfer to paper. Or you can use the following instructions.
There are other ways to make a paper cap with your own hands. Perhaps it makes sense to get acquainted with everyone and only then choose a certain one. Better yet, sit down to work with the baby and decide together what kind of cap he likes and how to embellish it and make it professional and unlike other objects. It may well be that the child comes to mind a new idea that will be the most useful. |

| Read: |
|---|
Popular:
How to choose a spinning test
|
New
- How to draw a firefighter with pencil in stages
- NOD "Ecology" Subject: "In the mushroom kingdom, berry state
- How to make a paper out of paper
- Making bee frames
- Pollack in the oven with carrots and onions
- Zelenushki and parsley: description, collection sites and cooking options
- How to make a paper out of paper cap - step by step
- How to get a loan from the Rosselkhozbank for LPH
- All about fishing. The concept of rod test
- Technique fishing carp on technoplankton


